How to Build a Pikler Triangle
Complete Step-by-Step DIY Guide
Build a beautiful, foldable climbing frame for your kids with this comprehensive DIY guide. Perfect for Montessori-inspired play and gross motor development.
# 6-8 Hours Build Time
# $150-200 Materials
# Ages 6mo – 6 years
What is a Pikler Triangle?
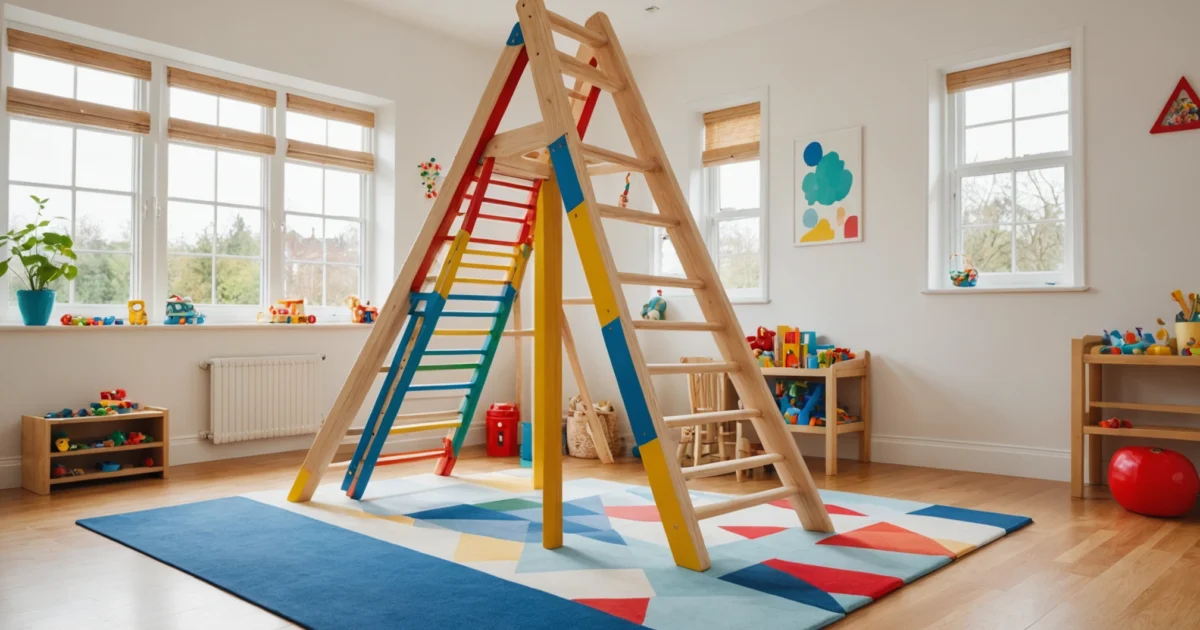
The Pikler Triangle is a revolutionary climbing frame for children developed by Hungarian Pediatrician Dr. Emmi Pikler in the early 20th century. This Montessori-inspired climbing structure helps children develop essential gross motor skills, build confidence, and learn spatial awareness through safe, self-directed play.
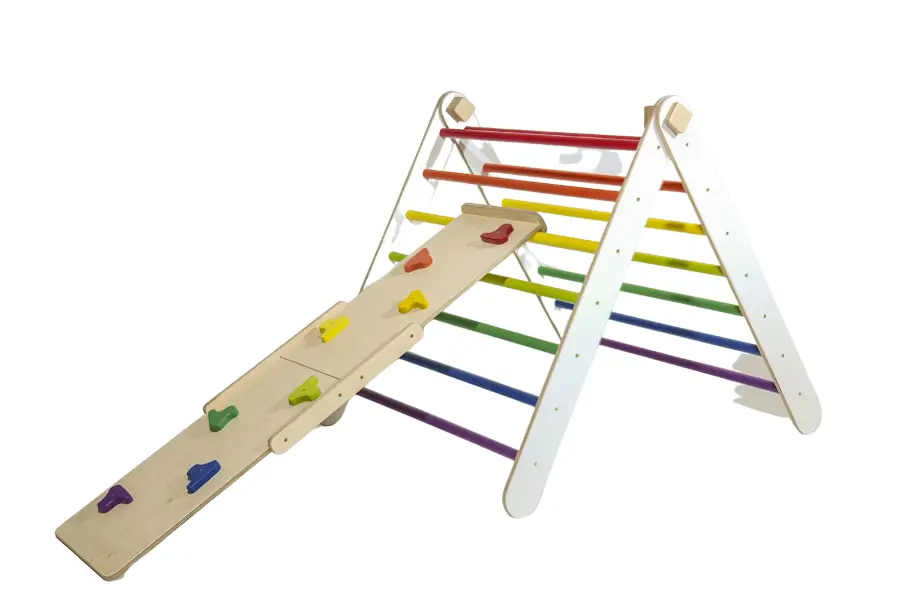
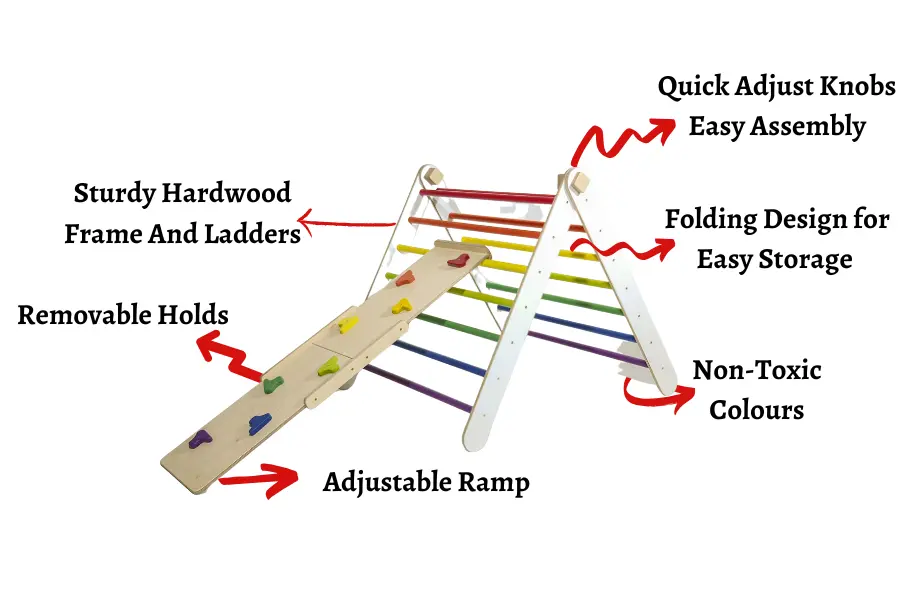
Our DIY version includes an innovative adjustable climbing ramp with removable climbing holds, allowing you to customize the difficulty level as your child grows. The entire structure folds up compactly for easy storage, making it perfect for both indoor and outdoor use.
As rock climbing enthusiasts, we were thrilled to create something that introduces our son to climbing in a safe, age-appropriate way. Our son absolutely loves it and spends hours exploring and climbing!
How to Make a Pikler Triangle (Pikler Triangle DIY)
Step 1: Primary Sketch and Tools and Materials
First, a sketch of the sports corner was drawn. Taking into account the available material, dimensional calculations are made. Looking at this you can get a first-hand idea on what will be the structure and what will be our procedure.
This project is built using easy-to-find materials that are available at the big box stores, as well as tools that most hobbyist woodworkers likely have already.
Tools Used
Project Specifications
Ladder
- 3″ Wide Legs
- 3/4″ Thick Legs
- 1″ Diameter Rungs
- 32″ Wide
- 36″ Long (Long Side)
- 32″ Long (Short Side)
- 31.5″ Tall in the Middle
- 30 Degree Incline
Ramp
- 6″ Grid Pattern for T-Nuts
- 24″ Wide
- 48″ Long
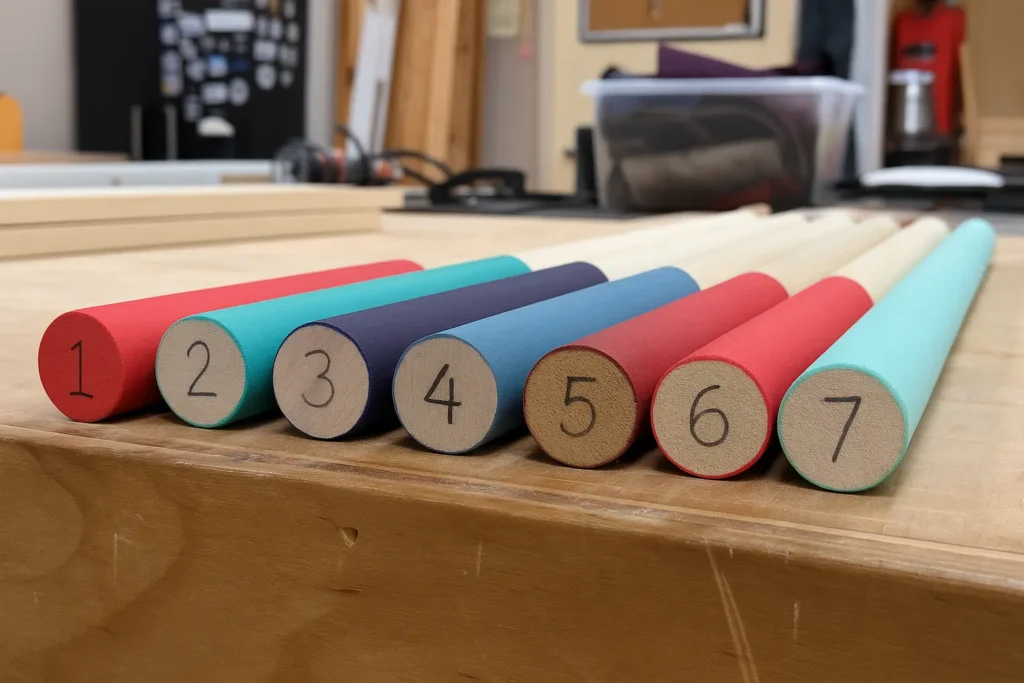
Step 2: The Rungs and the Colours
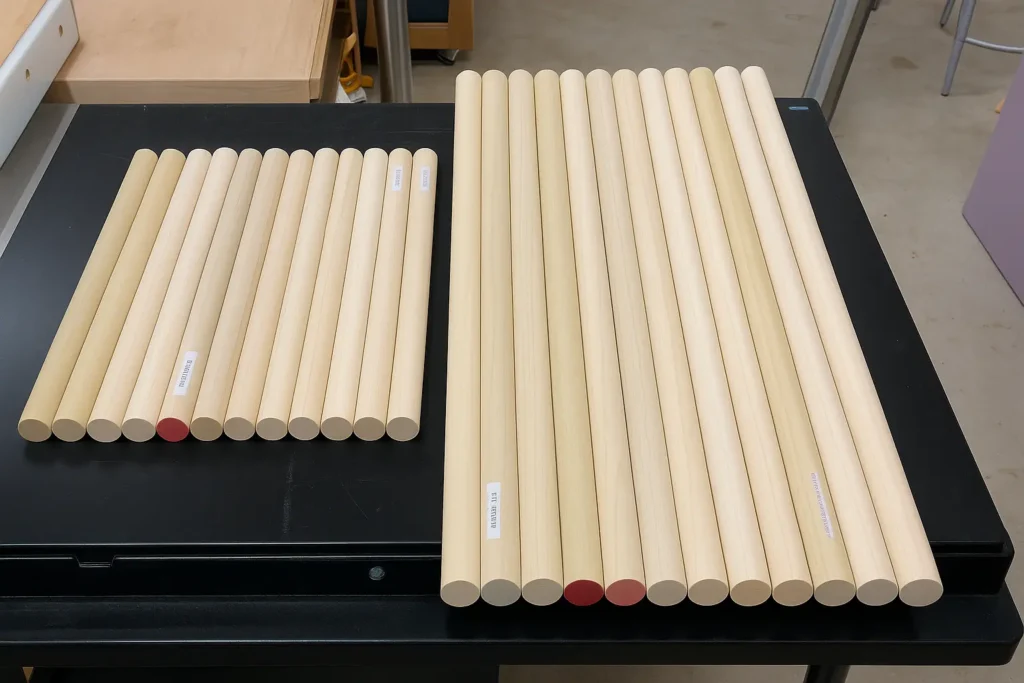
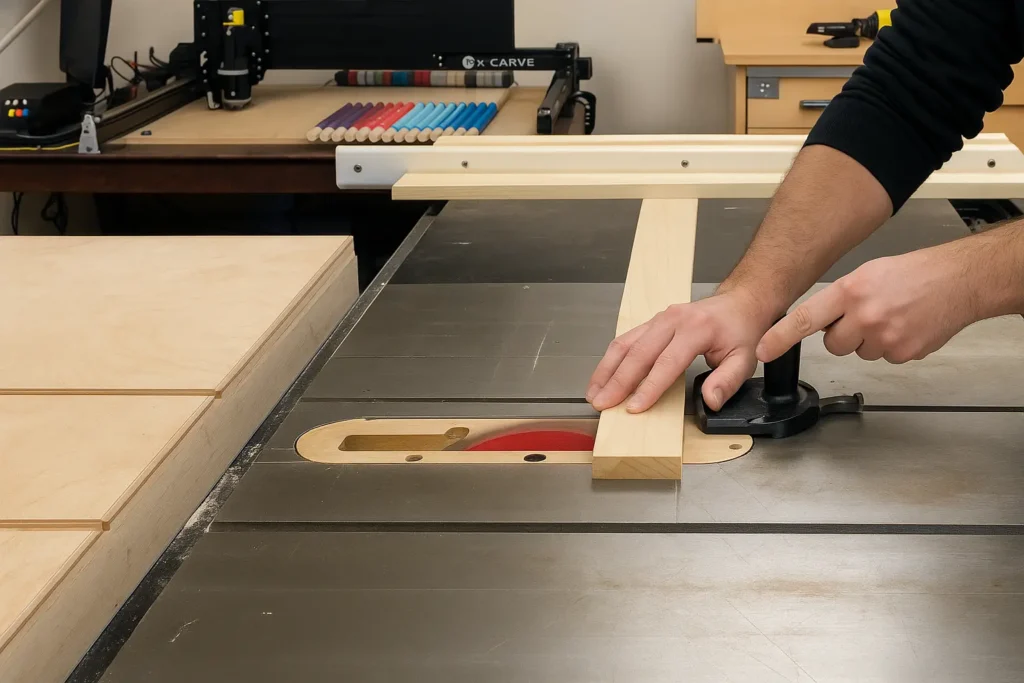
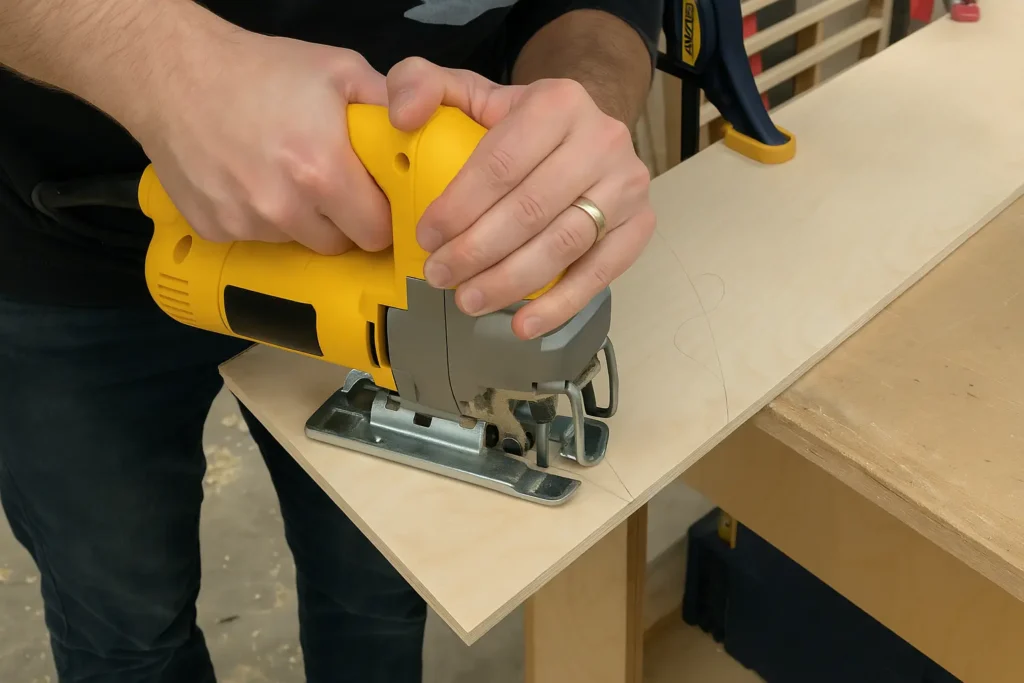
The first step of this build was to cut the individual rungs of the ladder. These are made from 1″ Poplar dowels that we picked up at the store. The ladder has two sides, one short and one long, so we needed 13 dowels in total.
We picked up 48″ dowels that we cut down to a length of 30.5″. This left an awkwardly sized cut-off that we’ll keep for later to use on another project.
The cutting process was straightforward – we set up a stop block on the table saw to ensure all dowels were exactly the same length. This precision is crucial for the final assembly, as any variation in length would make the ladder unstable or uneven.
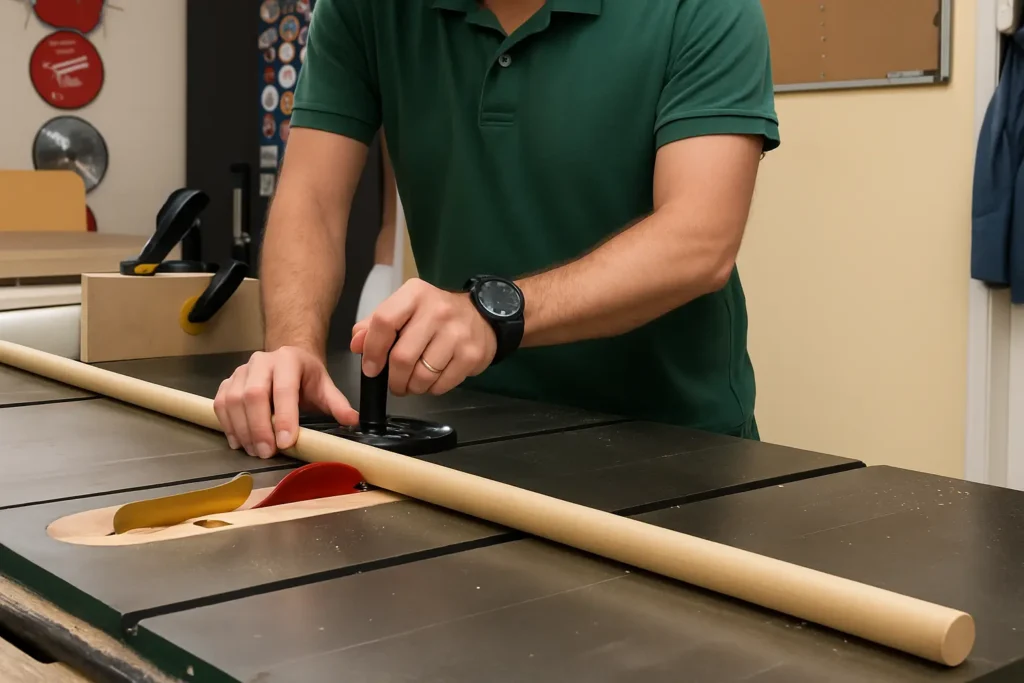
Pro Tip: Any saw will work fine to cut these, but whatever you use, try setting up a stop-block so you can cut all of them to exactly the same length. This will help later when we assemble it. We used the table saw here to cut these but a jigsaw, hand saw, or circular saw would work fine as well!
Once they were cut, we measured 6 inches from each end and wrapped them with blue painter’s tape to mask off the area where we wanted to paint in the next step.
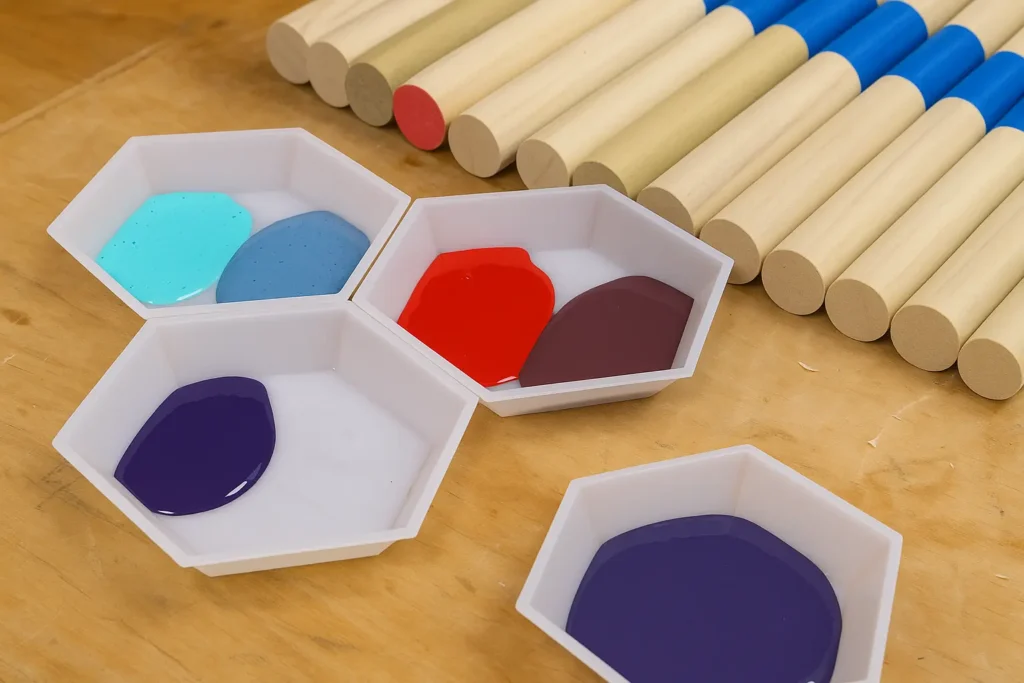
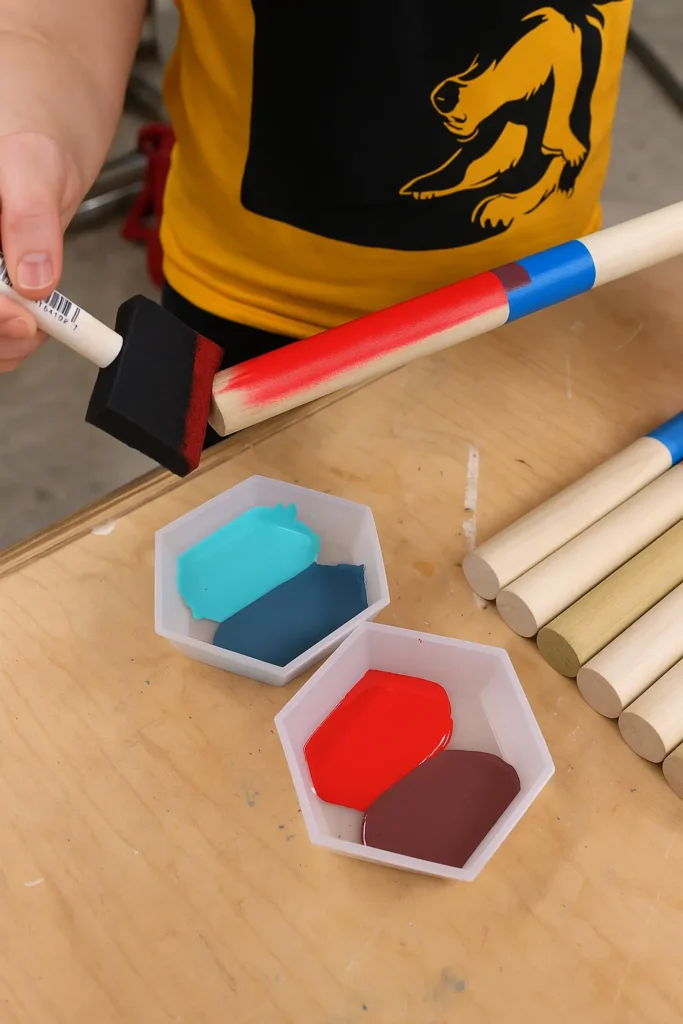
We used Milk Paint to color the ends of the dowels because it’s excellent for this type of project. It’s non-toxic so it’s great for kids projects and it works tremendously well on raw wood. No brush strokes, no streaks, fantastic coverage, and super bright colors!
We had five colors on hand, so we organized the dowels into a pattern we liked and painted the ends with a foam brush. This is completely optional but adding a little color made it look AWESOME!
The masking process was important to ensure clean paint lines. We carefully wrapped the tape around each dowel, making sure it was tight and even. After painting, we let the dowels dry completely before removing the tape to reveal the crisp, professional-looking color transitions.
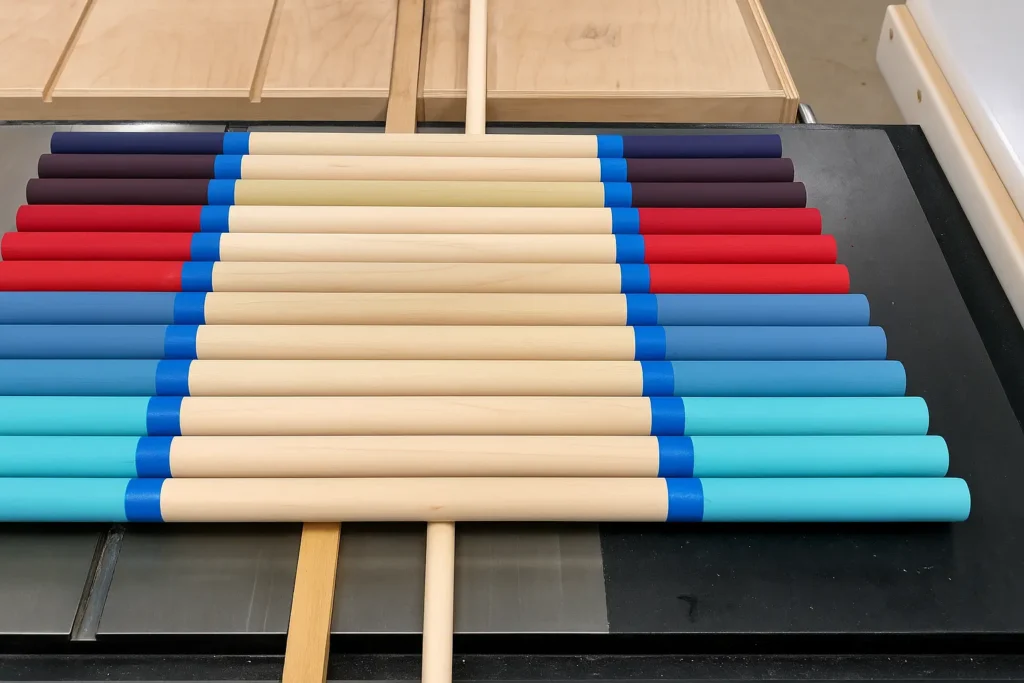
We chose bright, vibrant colors that would appeal to children while still looking professional. The milk paint dried quickly and provided excellent coverage without any brush marks or streaks, giving the dowels a smooth, finished appearance.
Once all the dowels were painted and dried, we carefully removed the painter’s tape to reveal the clean color transitions. The final result was a beautiful set of colorful rungs that would add visual appeal to the finished Pikler Triangle.
Step 3: Making the Legs
The legs of the ladder were made from 3/4″ thick Poplar boards. These are also easy to find at most of the big box stores and you can buy them at almost the exact size you need for this project.
Ours were ripped to a width of 3″ on the table saw. Don’t have a table saw? Another option is to rip them with a circular saw or to adjust the size overall so you can just use the boards “as is” right from the store.
The cutting process was straightforward – we set up a fence on the table saw to ensure all legs were exactly 3″ wide. This consistency is crucial for the final assembly and appearance of the ladder.
Pro Tip: If you purchase lumber at the store, try to give yourself a little extra time to look through what they have and find the straightest boards you can. If the boards are curved or damaged, it makes every step of the project a little more difficult.

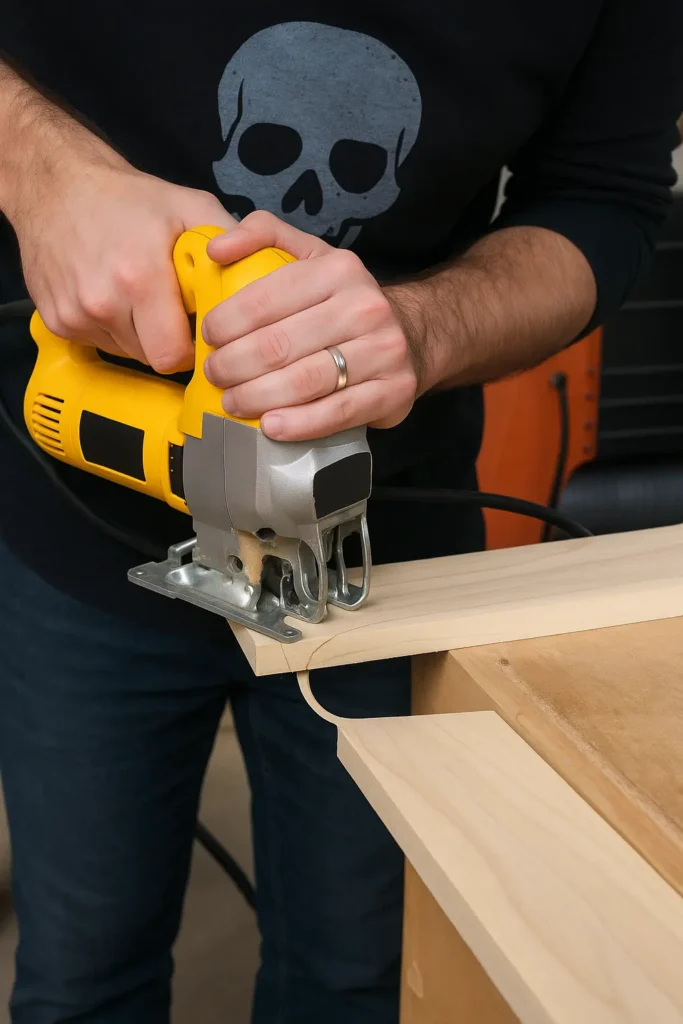
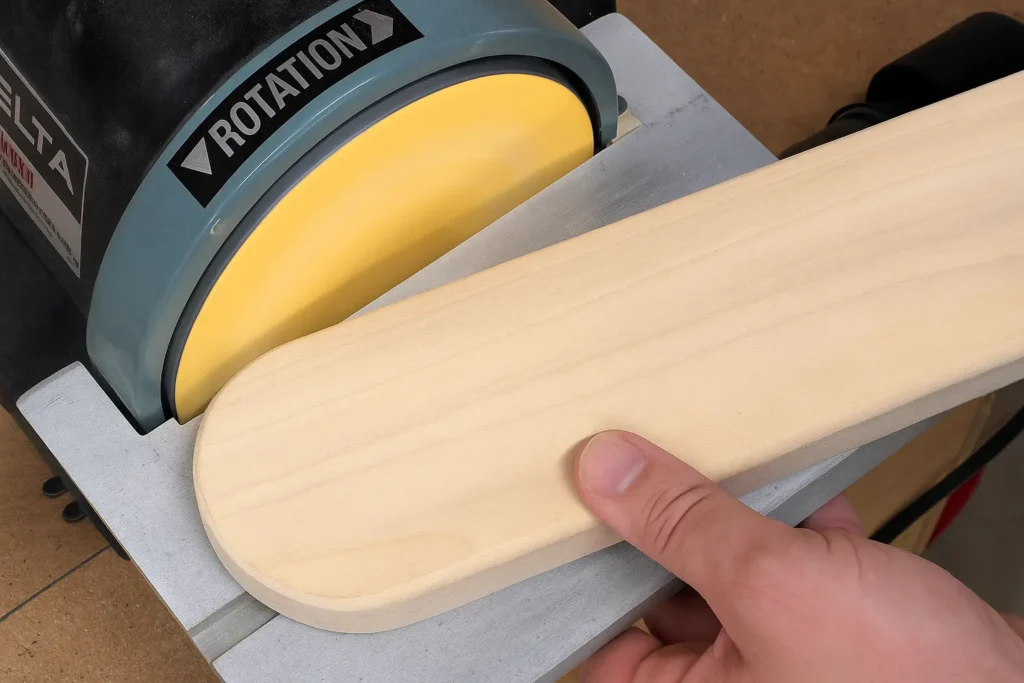
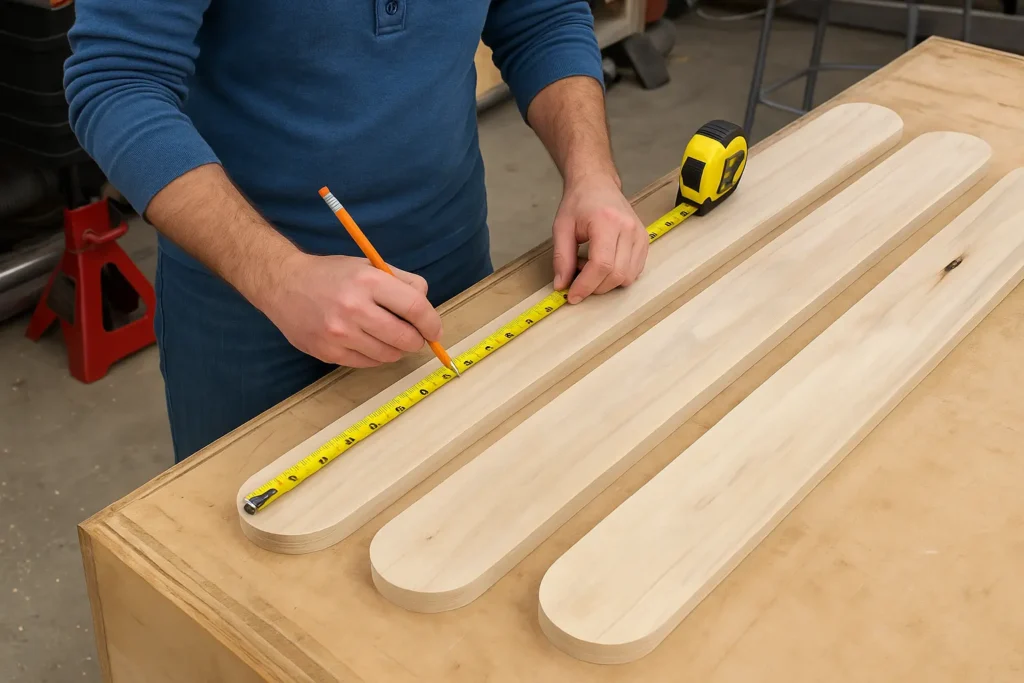
We squared off the end of each leg and then used a mason jar lid to give it a round profile. (Perfect size!) Next, the jigsaw was used to cut out the round shape on both ends of all four legs.
We have a small desktop disc sander we found at a garage sale which helped to smooth out the ends, but you could also use sandpaper to do this. The rounded ends give the ladder a more finished, professional appearance.
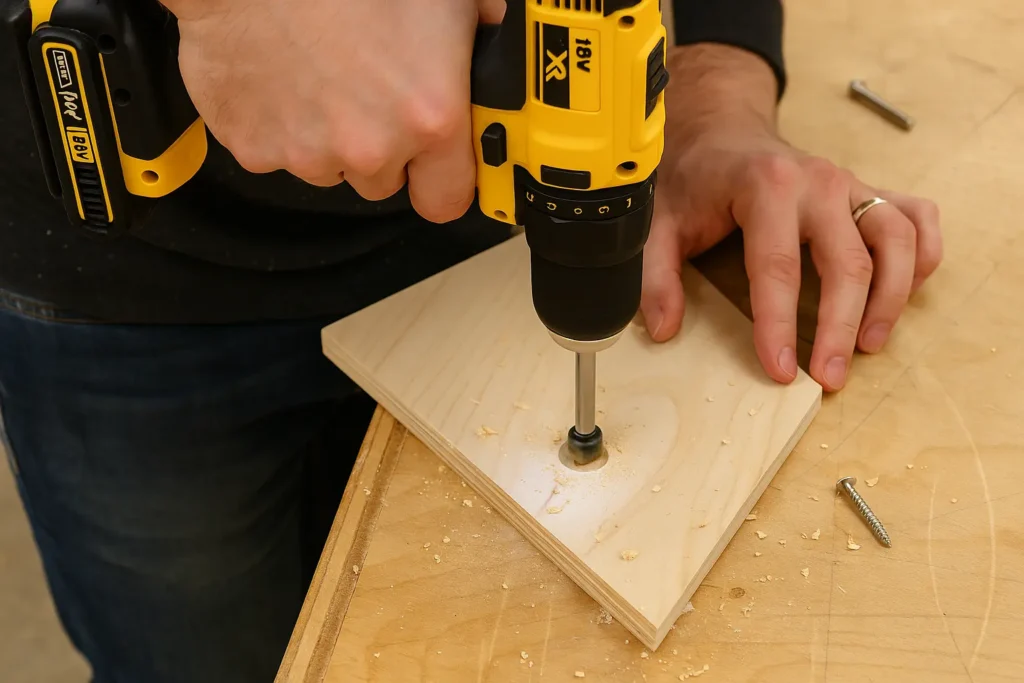
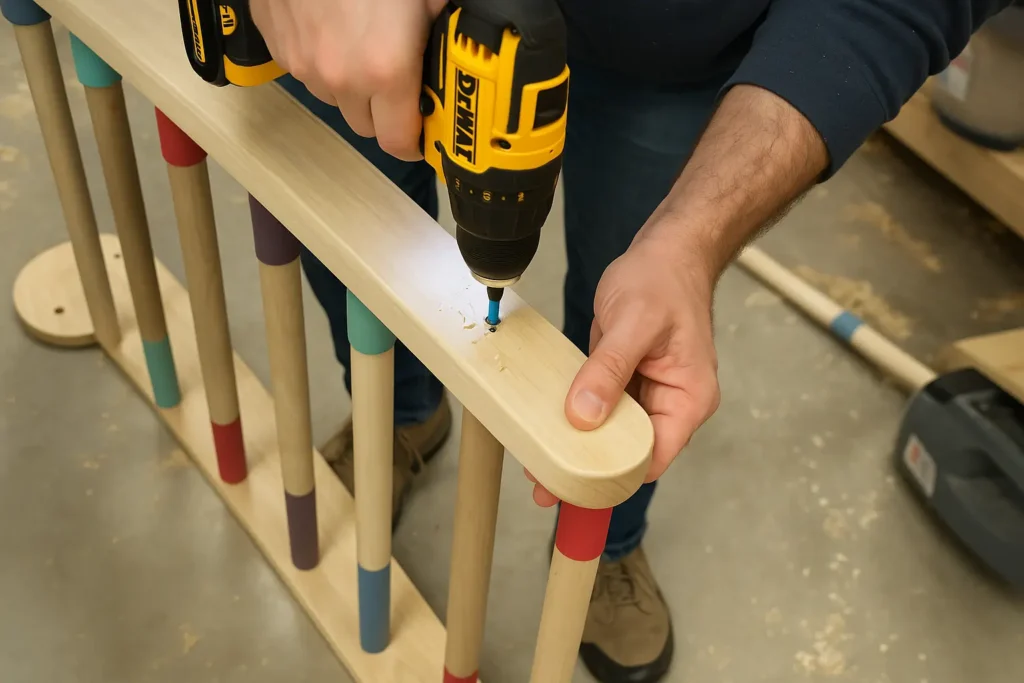
We started 1 inch from the end to mark the first hole and then measured every 5 inches all the way across. This gave us the correct amount of holes that were spaced the way we wanted them on the ladder. The bottom-most rung is above the ground a bit since there’s no reason to have it right up against the floor.
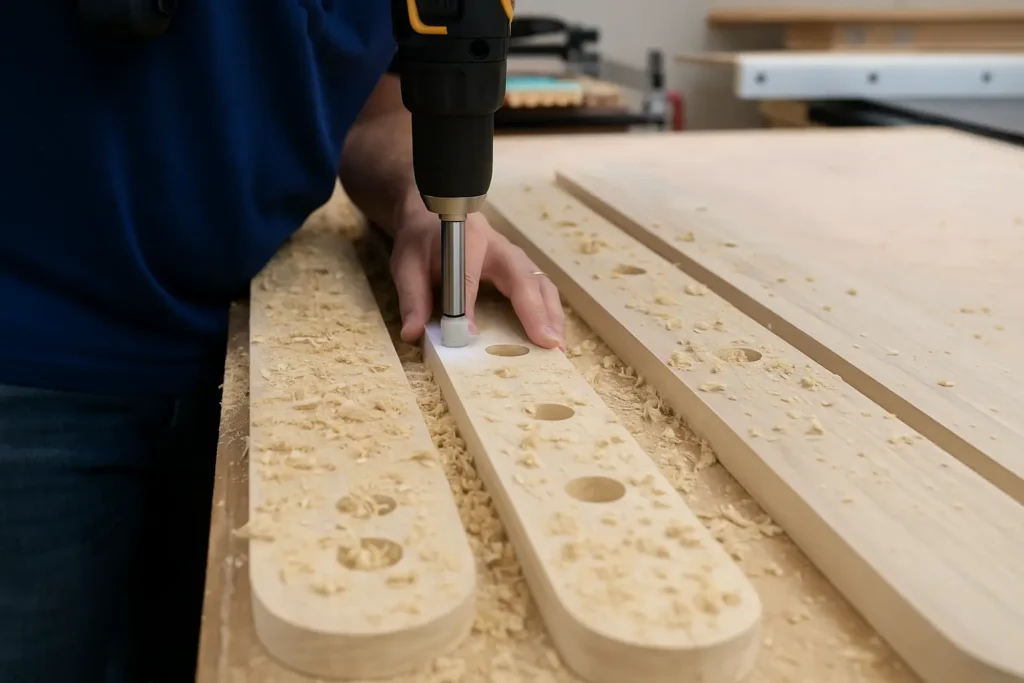
After marking the position of all of the holes, we used a 1″ Forstner drill bit to drill a clean hole to a depth of 1/2″. This creates perfect cylindrical holes that will hold the dowels securely.
The drilling process requires patience and precision – we made sure to drill each hole perfectly perpendicular to the leg surface. This ensures that when the dowels are inserted, they will be perfectly level and create a stable climbing surface for children.
We drilled all four legs with identical hole patterns to ensure the ladder sides are perfectly symmetrical. This attention to detail is crucial for both the structural integrity and visual appeal of the finished Pikler Triangle climbing frame.
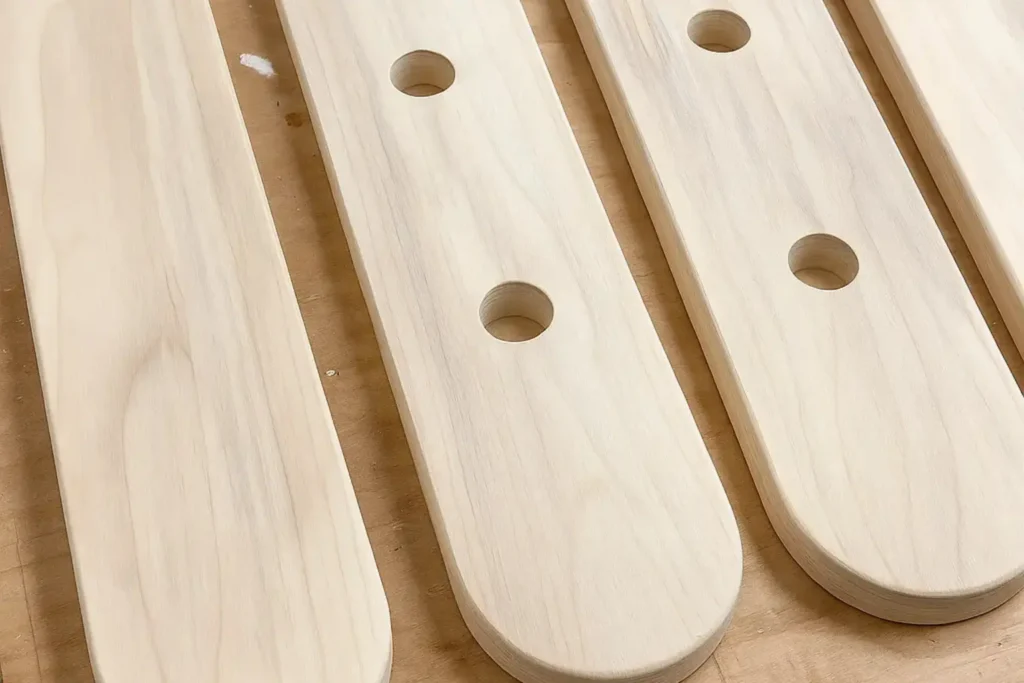
The 1/2″ depth provides the perfect balance between security and ease of assembly. The dowels will fit snugly without being too tight, making the final assembly process smooth and ensuring the rungs won’t loosen over time with use.
Once all drilling was complete, we gave each leg a final sanding to remove any rough edges around the holes. This step ensures the finished ladder will be safe for children’s hands and provides a professional, polished appearance.
Pro Tip: Forstner bits are your best friend if you’re trying to drill nice clean holes. If you don’t have a set, we highly recommend picking some up for your woodworking!
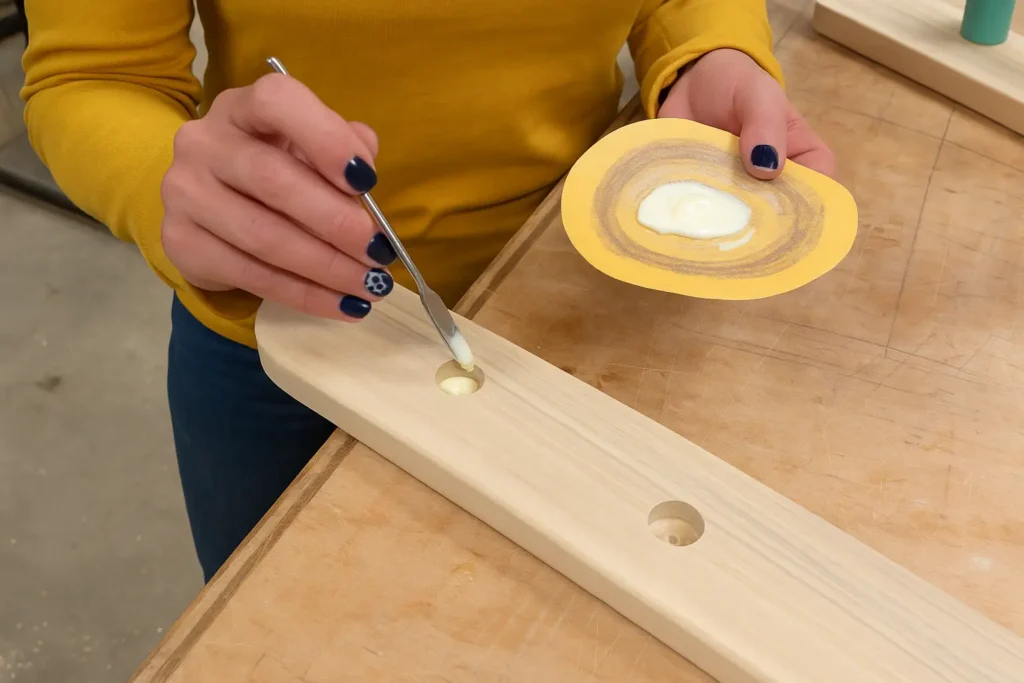
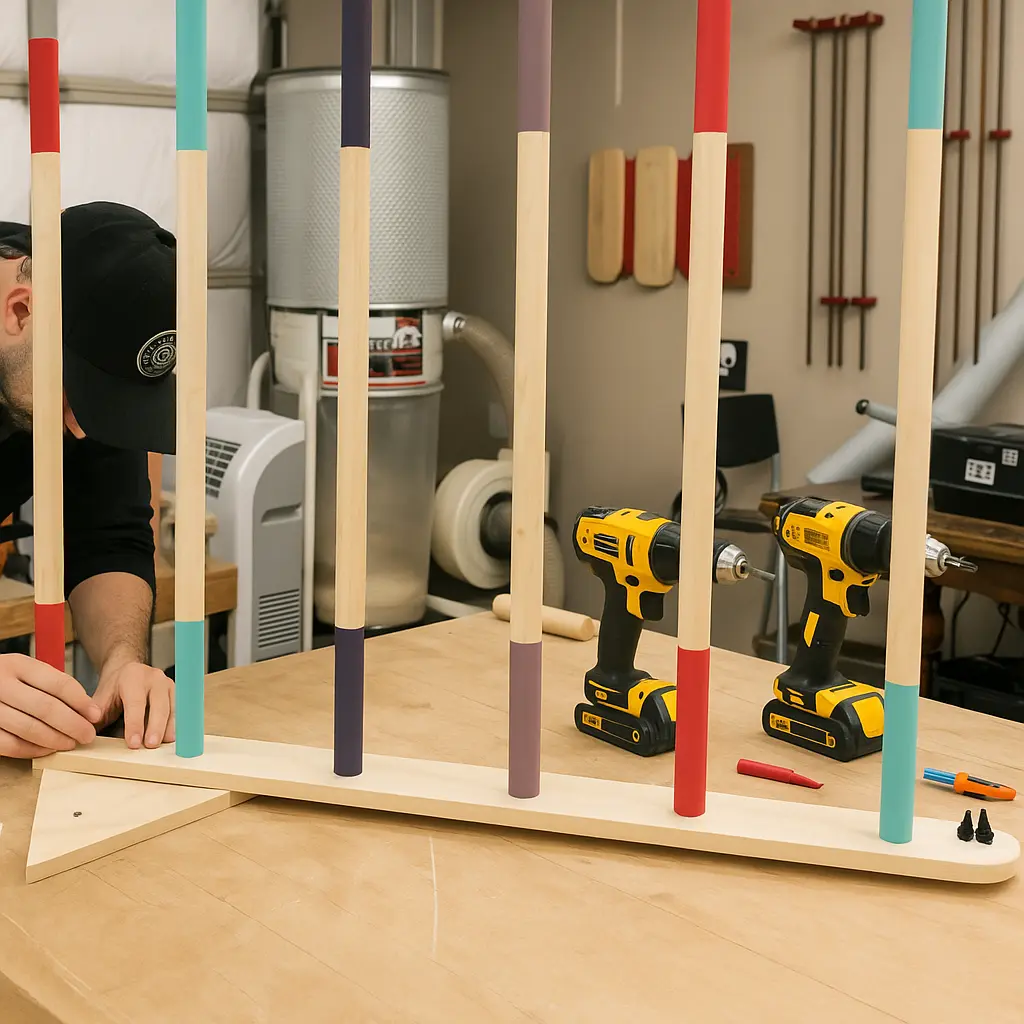
Step 4: Gluing Up the Ladders
To glue the ladders together, we used some basic wood glue and carefully applied it to each of the holes on one side. We then used a mallet to gently tap the ladders all the way into the holes.
Once all of them were in, we applied glue to the opposite side, flipped around the ladder and tapped it in from the top.
The gluing process requires careful attention to detail. We made sure to apply an even layer of glue to each hole, ensuring complete coverage without excess that could squeeze out and create a mess.
Pro Tip
It’s very easy to get out of square at this point since the ladder rungs will want to twist a bit. Take your time and ensure things go together nice and square. If you see it start to twist, adjust it as quickly as possible so by the time the glue starts to get tacky it’s straight. A twisty ladder will make for a tricky assembly later on.
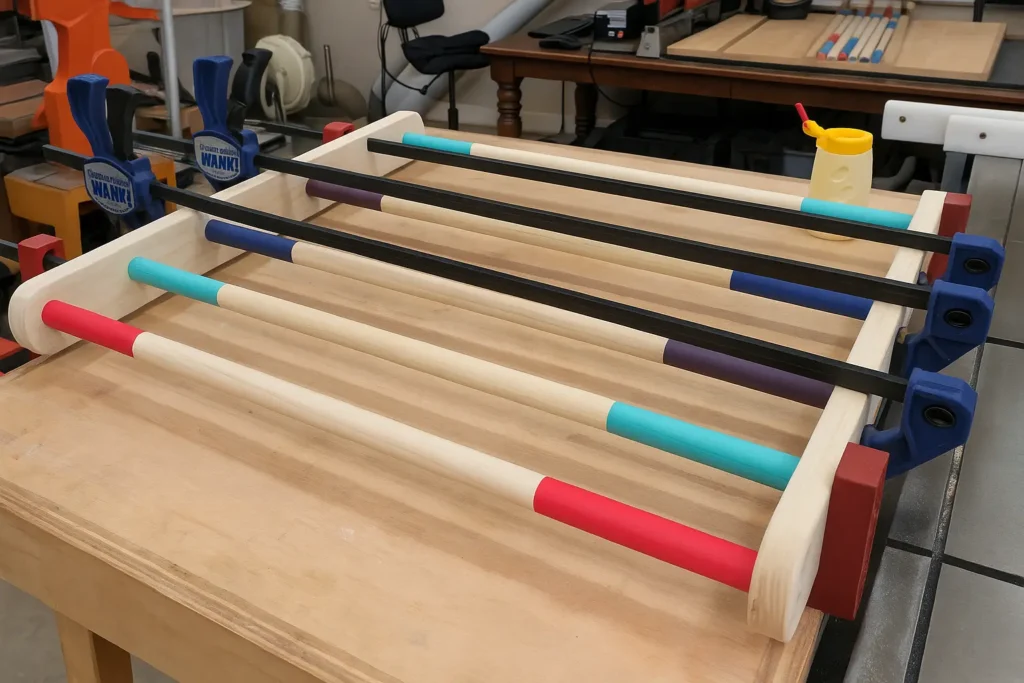
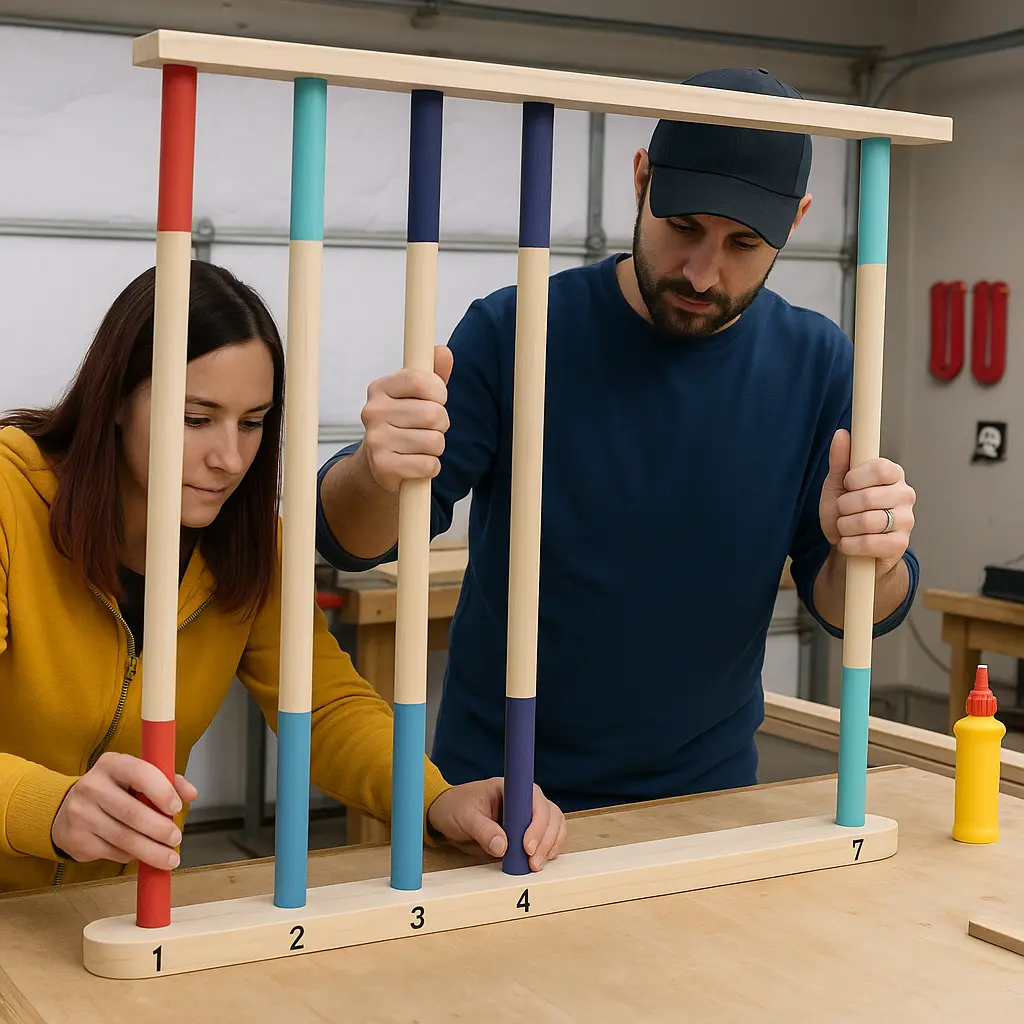
With everything in place, we clamped it tightly and let it dry overnight. Because the dowels fit tightly into the holes, the clamps aren’t strictly necessary but they do help to ensure the sides are pulled all the way together.
The clamping process is crucial for achieving a strong, permanent bond. We used multiple clamps positioned strategically to apply even pressure across the entire assembly, preventing any gaps or misalignment.
We allowed the glue to cure for a full 24 hours to ensure maximum strength. This patience pays off in the long run, as a properly cured joint will withstand years of active use by children.
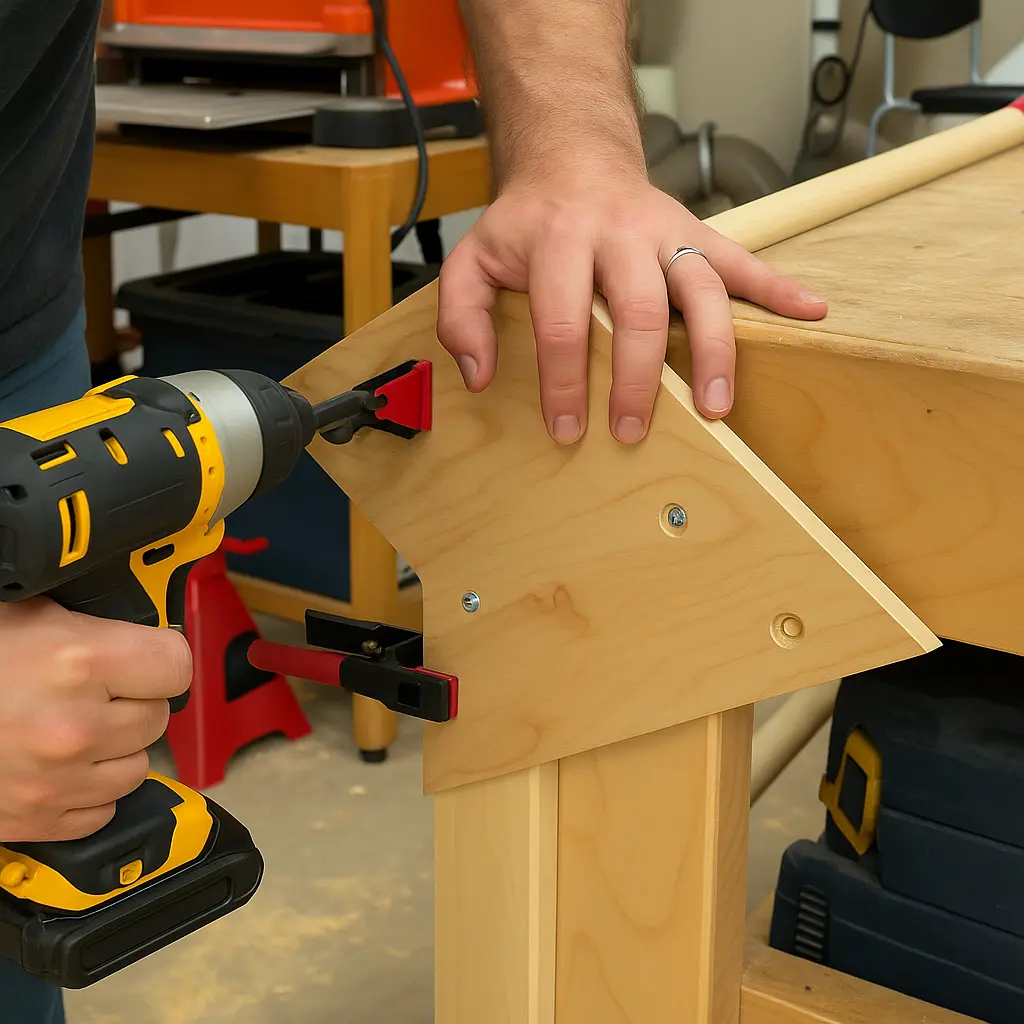
Step 5: Making the Triangle Connectors
The two ladders (the long and the short) are held together at the top by a triangular piece on each side. We made these from 1/2″ birch plywood, which provides excellent strength and durability for this climbing frame component.
The angle of our Pikler Triangle is 30 degrees when it’s unfolded, so we made a template from some cardboard and drew the position of the legs so we could align everything perfectly. This precise angle ensures optimal climbing difficulty for children while maintaining safety.
The triangular connectors are essential for the folding mechanism of the Pikler Triangle. They act as the pivot points that allow the climbing frame to collapse for easy storage and transport, making it perfect for both indoor and outdoor use.
Pro Tip
Remember that the two triangles are opposites of each other, so when you mark the position of the holes with your template, flip it upside down to mirror it. This ensures perfect symmetry for the folding mechanism and prevents binding when the Pikler Triangle is opened and closed.
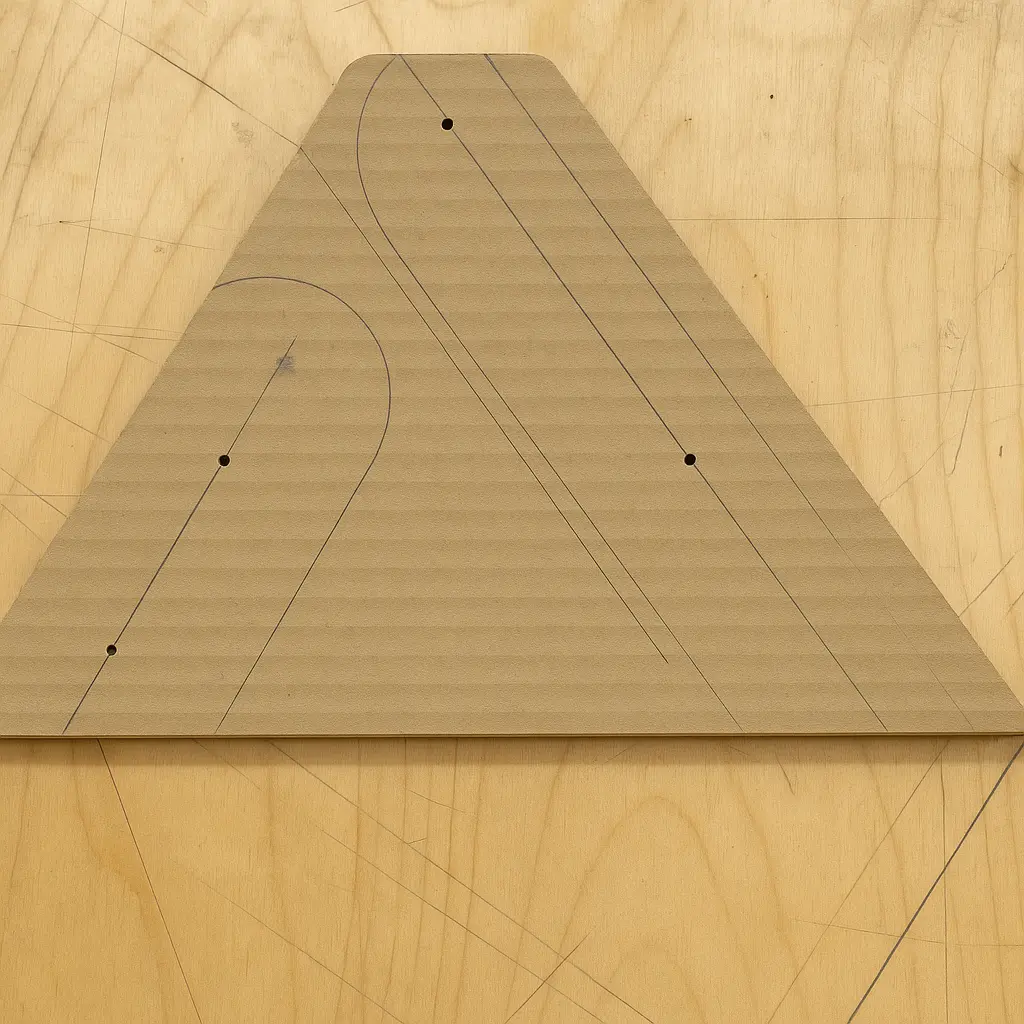

The long side of the ladder is attached permanently to the triangle, so we marked and pre-drilled pilot holes for two screws on the long side. This permanent connection provides the stability needed for safe climbing activities.
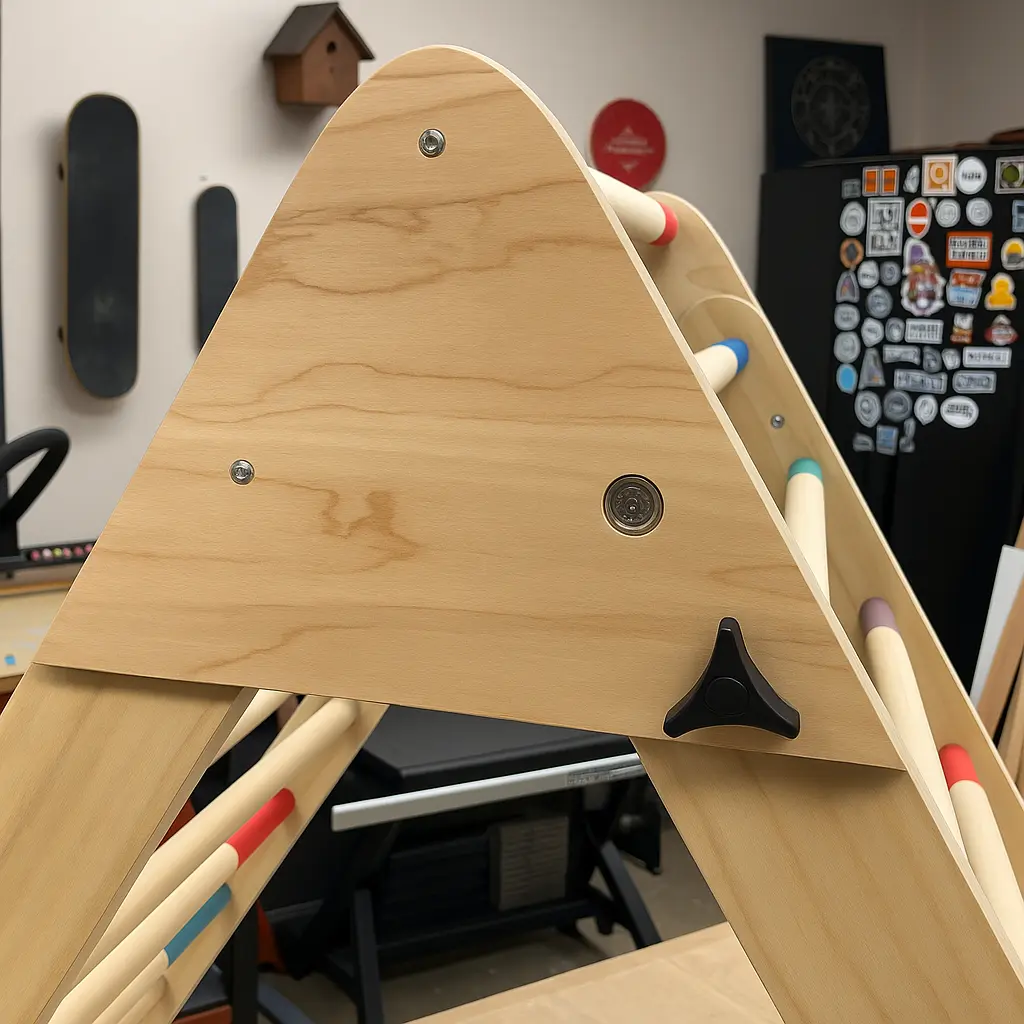
The short side also has two screws, but one of them acts as a pivot point and the second is for an adjustable plastic knob that we can use to quickly fold and unfold the ladder. This innovative design makes the Pikler Triangle incredibly practical for families with limited space.
The two holes for the Long side are simple pilot holes for the permanent screws, and the two holes for the Small side are drilled with Forstner bits to accommodate the pivot mechanism. This combination ensures both strength and functionality.
The pivot mechanism is what makes this Pikler Triangle so versatile. The adjustable plastic knob allows for easy folding and unfolding, making storage and transportation much more convenient. This feature is especially valuable for Montessori-inspired play spaces.
We carefully positioned each hole to ensure the ladder would fold smoothly without binding. This attention to detail ensures years of reliable operation and prevents wear on the moving parts.
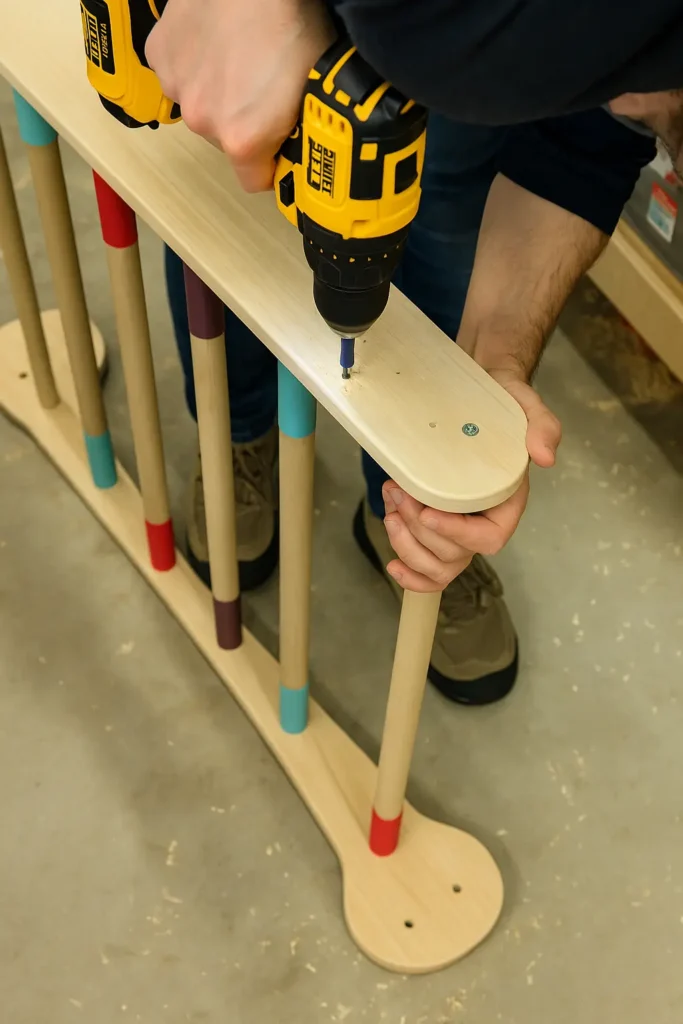
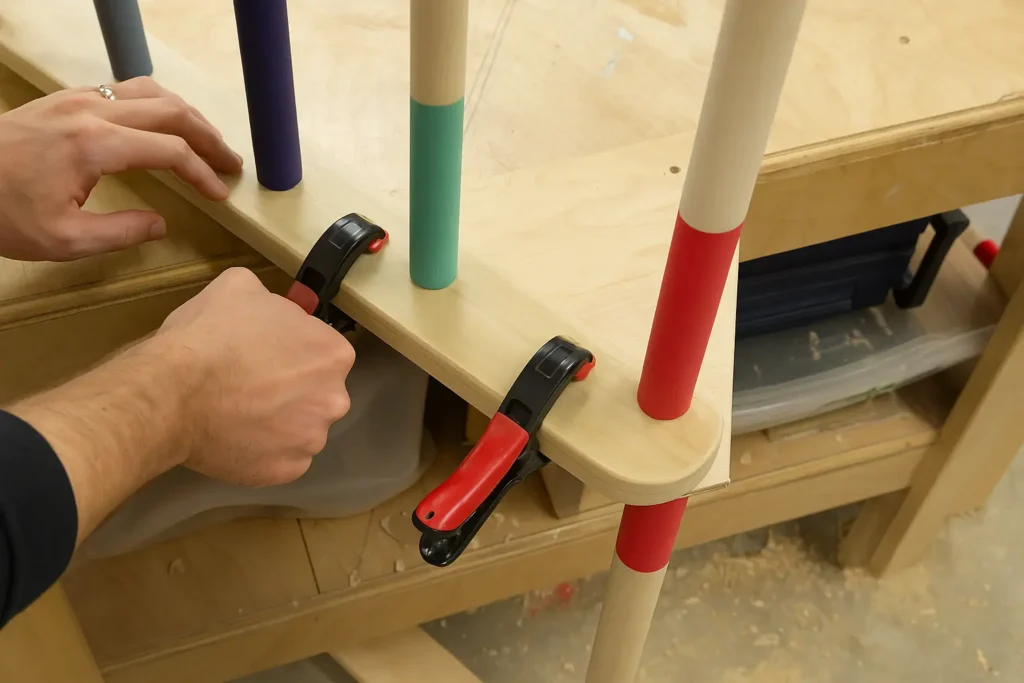
Step 6: Final Ladder Assembly
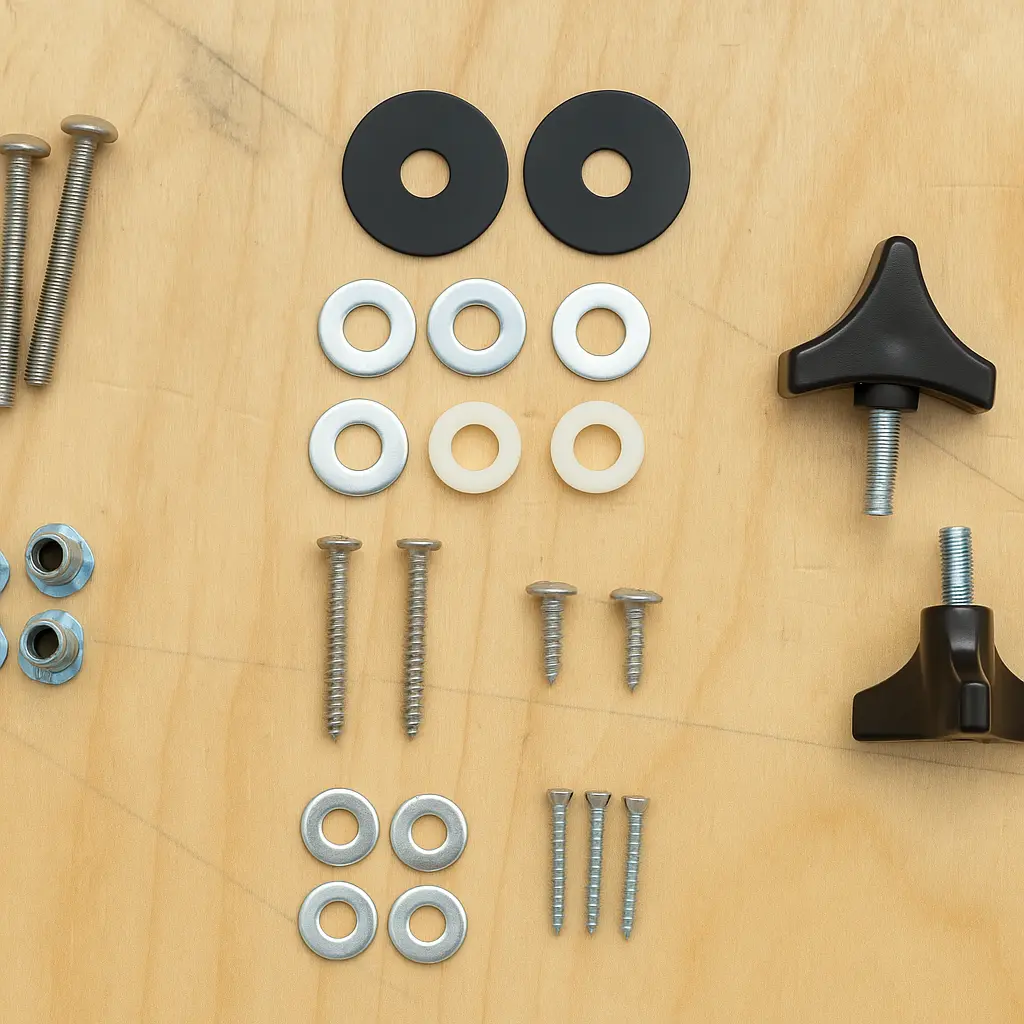
With the triangles made, we could now start putting the whole thing together. The hardware we’re using is just some basic washers, screws, and two 1/2″ plastic spacers – all readily available at any hardware store.
We positioned the longer side of the ladder onto one of the triangles so that the top and side of it lined up nicely. We clamped it on temporarily, moved it down off the bench, and drilled some pilot holes using the existing holes as a reference.
The assembly process requires careful attention to alignment. We made sure each component was perfectly positioned before drilling any holes, ensuring the final climbing frame would be stable and safe for children’s climbing activities.
This final assembly step is crucial for the structural integrity of the Pikler Triangle. Proper alignment ensures the folding mechanism works smoothly and the climbing frame remains stable during active play.
Pro Tip
Since Poplar is a hardwood, we made sure to drill pilot holes whenever using screws so that we didn’t risk splitting the wood. Additionally, it really helps to make sure your workpieces stay aligned during assembly since the holes are pre-drilled.

Next, we applied some wood glue and screwed it into place using two wood screws. The shorter side of the Ladder then got clamped on, and we used a pen to mark the position of the other two holes. This allowed us to take it back off and drill two holes for the threaded inserts in exactly the right spots.
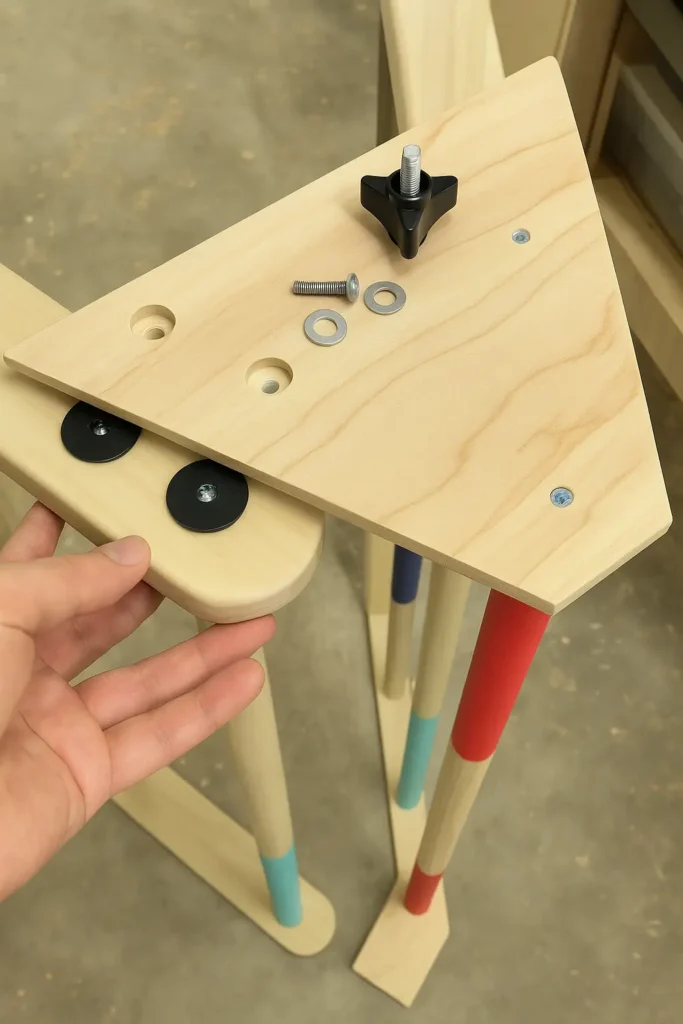
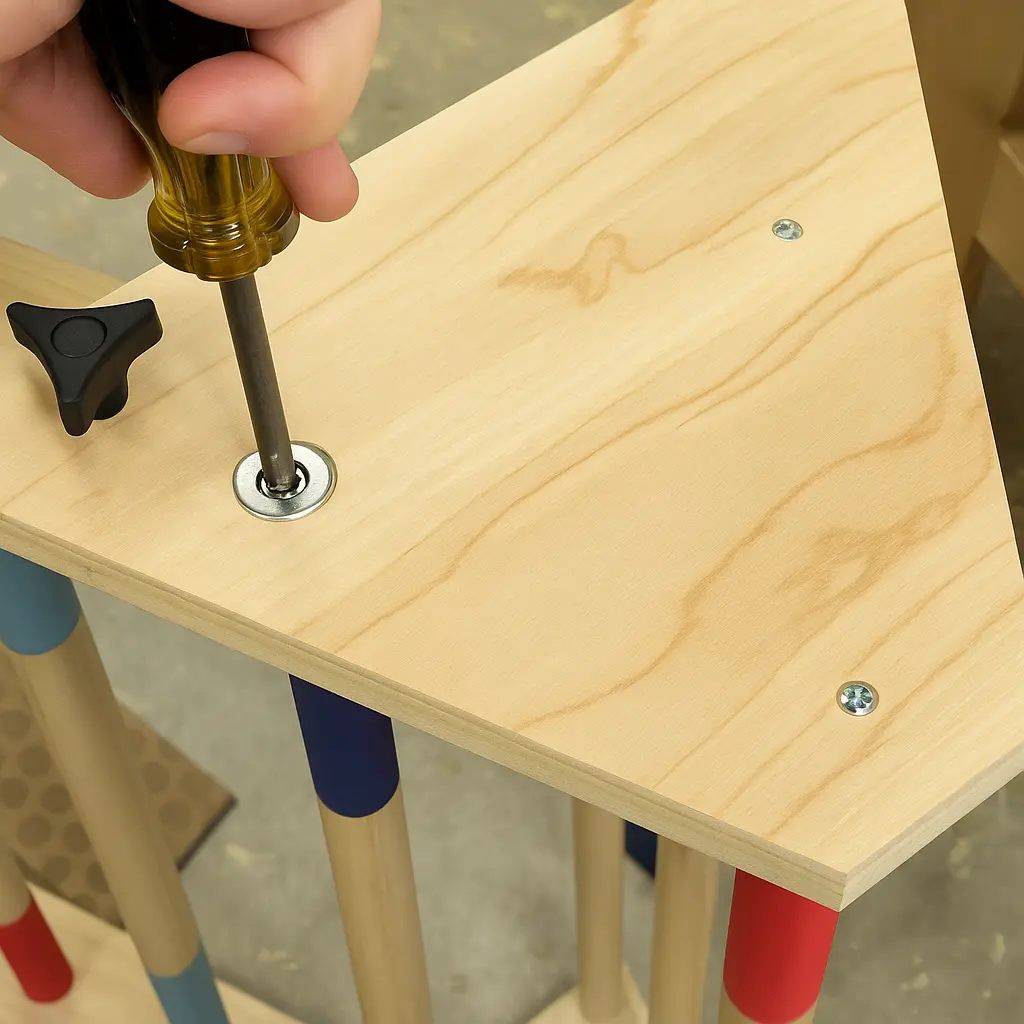
To assemble the rest, first two washers went in between the triangle and the leg, which gives it a tiny bit of space in between the plywood so there’s no friction when it rotates. This spacing is essential for smooth operation of the folding mechanism.
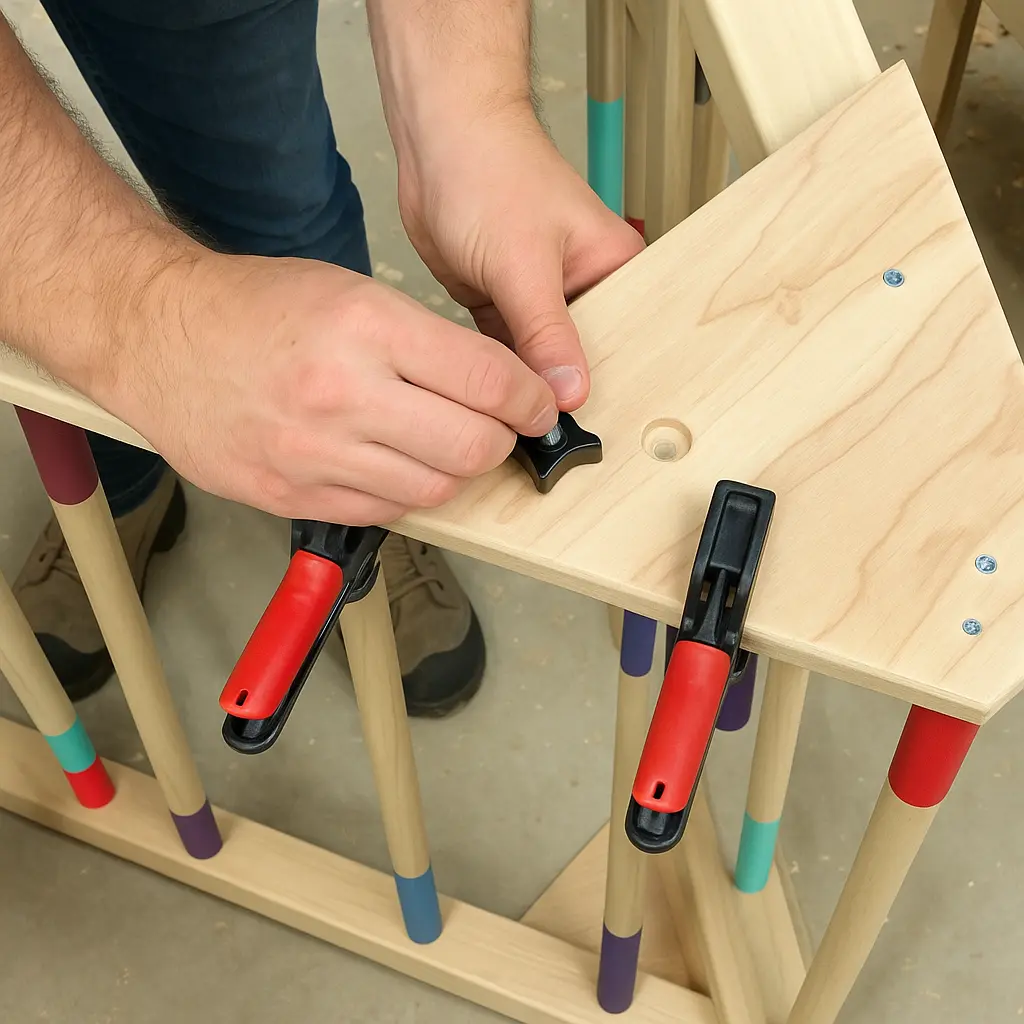
Next, a washer and a screw get installed in the top hole through the plastic spacer. This acts as our pivot point, and it freely rotates as the ladder folds and unfolds, creating the versatile folding climbing frame that parents love.
Lastly, a washer and the adjustable knob go into the lower hole. This is used to tighten the ladder in place when folding and unfolding it, providing the perfect balance between security and ease of use.
The combination of these hardware components creates a robust yet flexible connection that can withstand years of active use by children while maintaining the smooth folding functionality that makes this Pikler Triangle so practical.
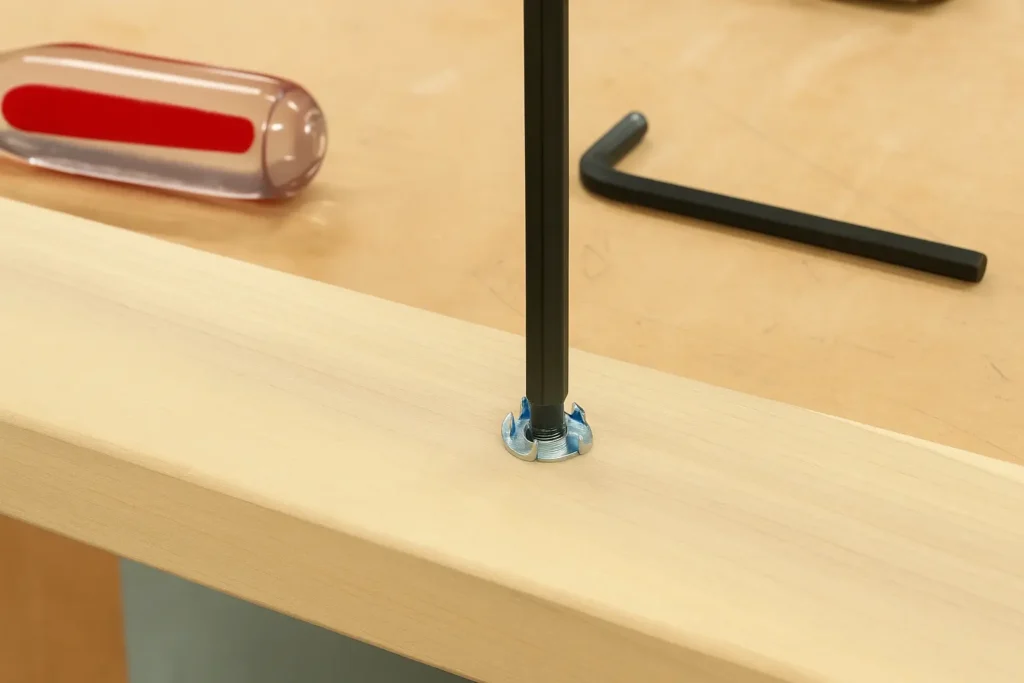
Pro Tip
Installing threaded inserts into a hardwood like Poplar can be troublesome. Try putting some paste wax on the threads of the insert to help it go in smoothly. If you don’t, they might break and then get stuck in there…. (Ask us how we know this!)
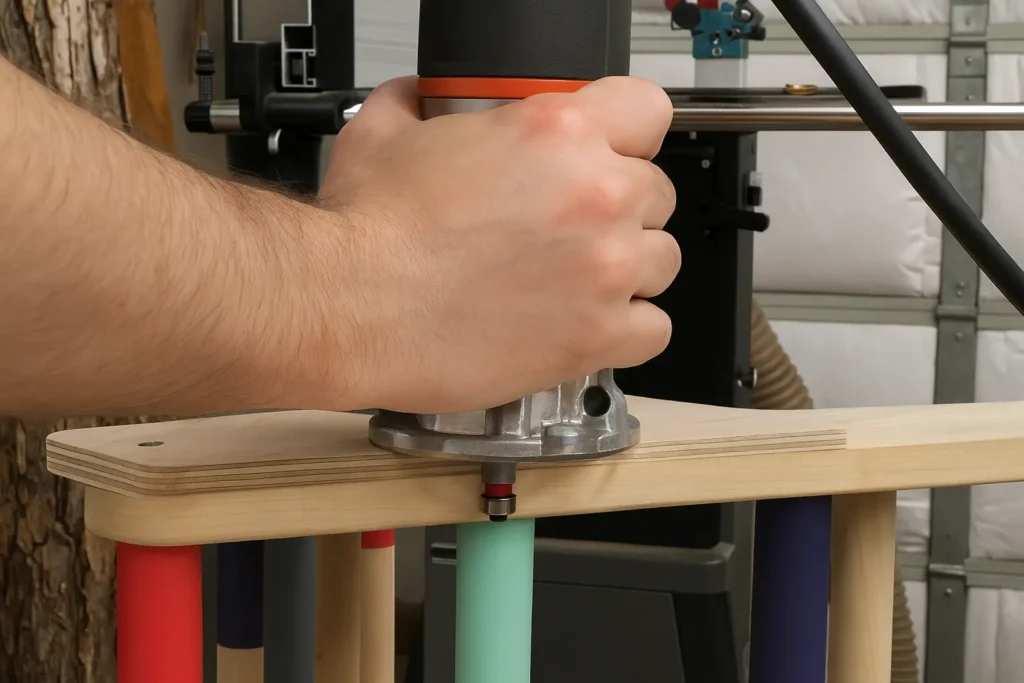
Once everything was installed and tightened in its final position, a trim router with a flush trim bit helped us make sure the triangle was perfectly flush with the legs. Since the top of the triangle is square, we also used it to round it off to follow the same profile as the rounded top of the ladder legs.
This final finishing step ensures the Pikler Triangle has a professional, polished appearance while maintaining all the safety features essential for children’s climbing equipment. The smooth, rounded edges prevent any potential injuries during active play.
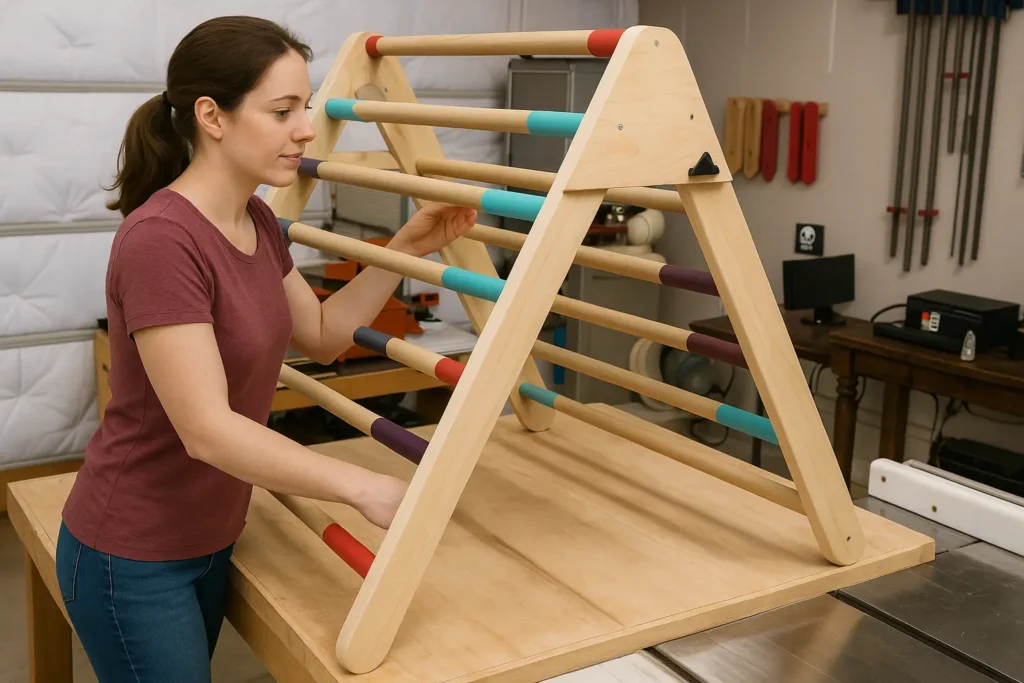
That wrapped up the assembly of the ladder! The completed climbing frame now features a smooth folding mechanism, sturdy construction, and child-safe design that will provide years of entertainment and developmental benefits for children.
Step 7: The Climbing Ramp
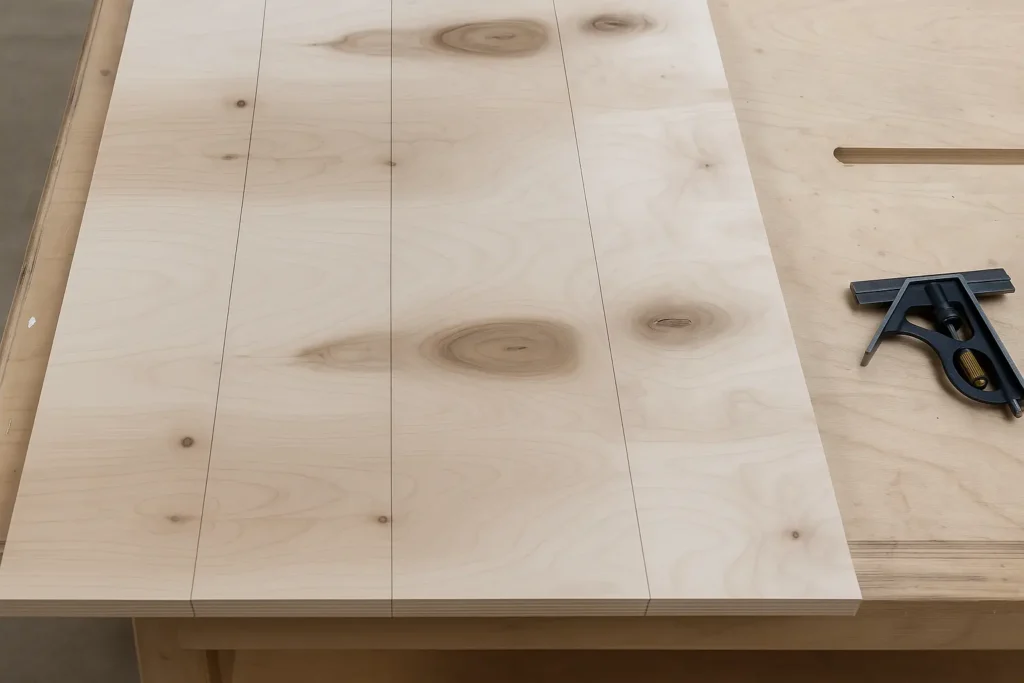
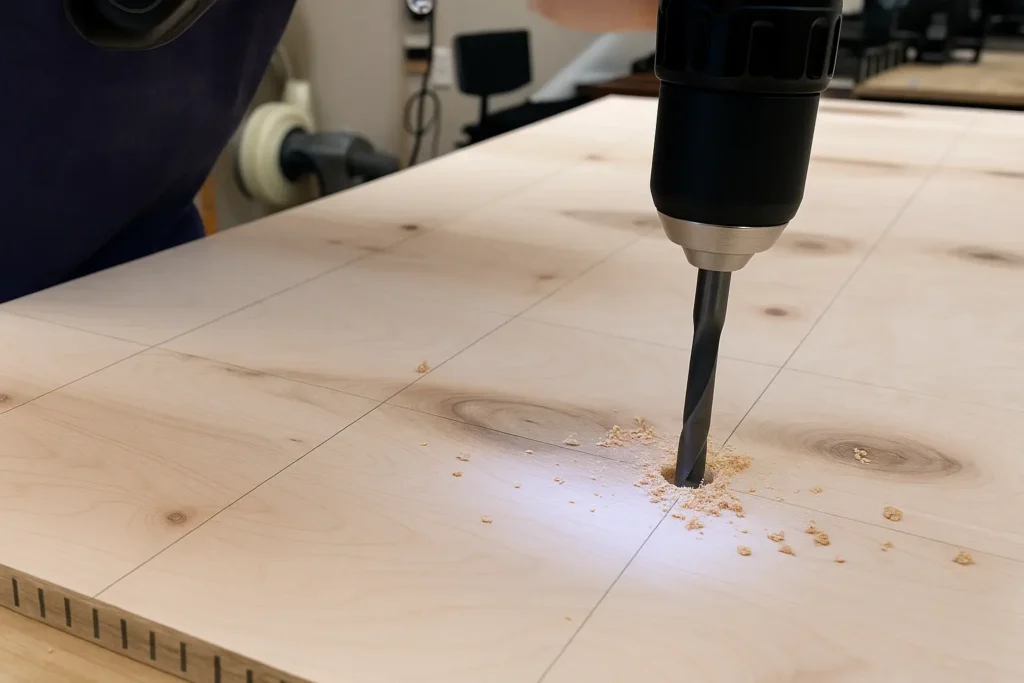
To build the climbing ramp, we used 3/4″ birch plywood for its strength and durability. This premium material ensures the ramp can withstand the weight and activity of active children while maintaining a smooth, splinter-free surface. After ripping it down to the width we wanted (24″), we drew three lines down the length of the board that were 6″ apart to create our mounting grid system.
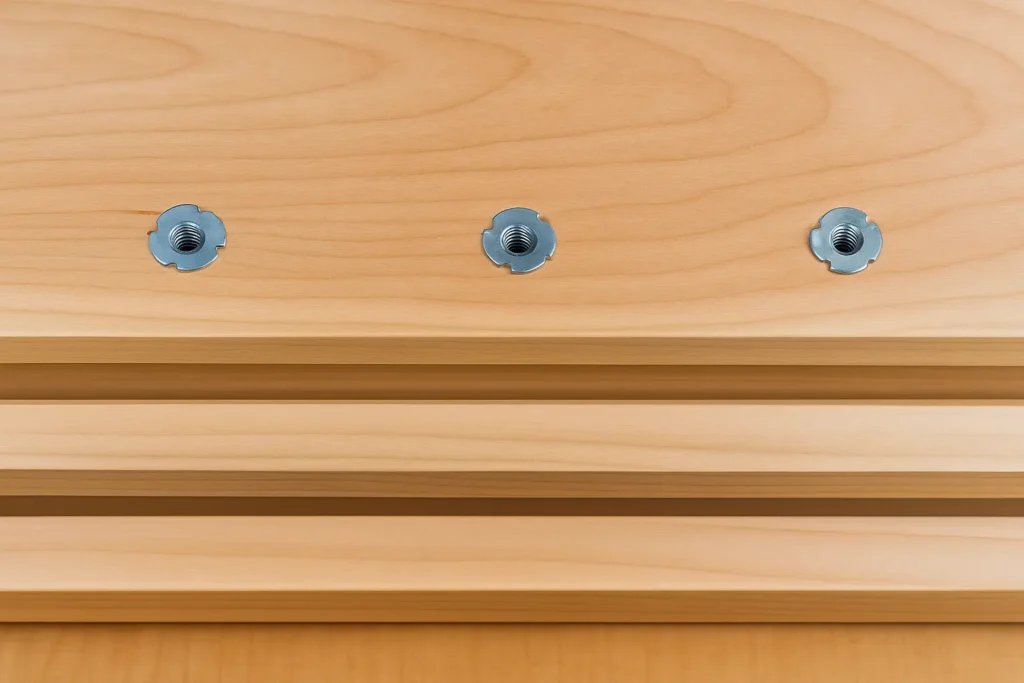
We then measured 6″ all the way down from the end and squared the lines across, giving us a comprehensive grid pattern for our T-nuts. The climbing holds screw into these T-nuts, so having a large grid pattern gives us lots of options for installing the climbing holds in different variations and difficulty levels. This modular approach allows for endless climbing configurations that can grow with your child’s developing skills.
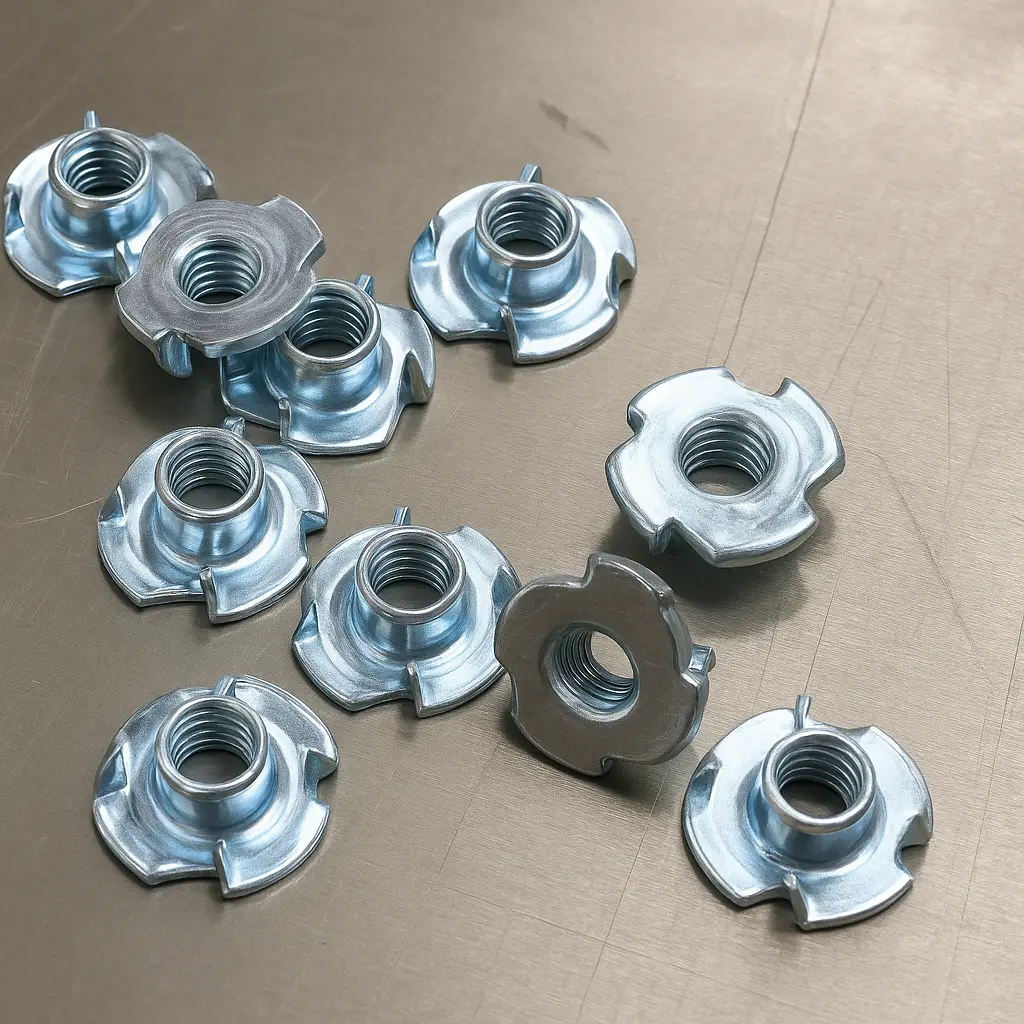
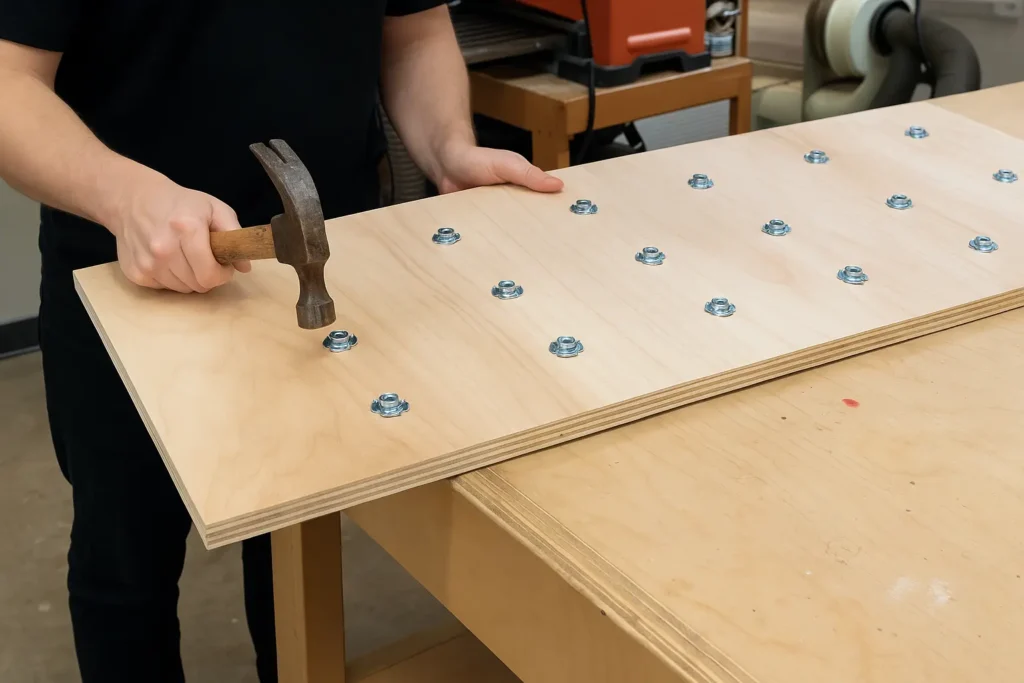
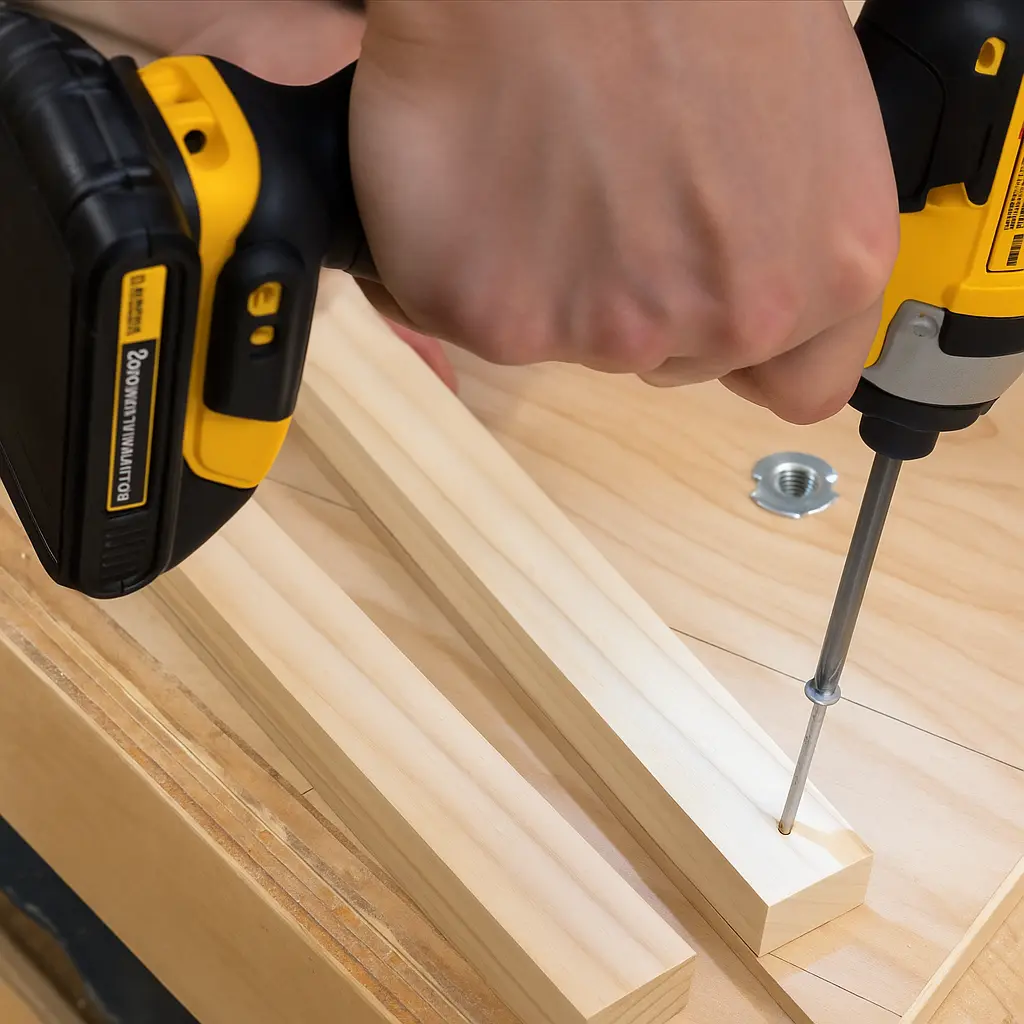
The T-nuts got installed from the back side after drilling a 3/8″ pilot hole. From there, all it takes is a single hard hit with a hammer and they go in easily. This installation method ensures the T-nuts are flush with the surface and provides a secure foundation for all climbing hold attachments. The back-side installation also maintains a clean, professional appearance on the climbing surface.
This climbing ramp design enhances your Pikler triangle setup by providing additional gross motor development opportunities. The adjustable angle and customizable hold placement make it suitable for children of various ages and skill levels, from toddlers just learning to climb to older children seeking more challenging climbing experiences.
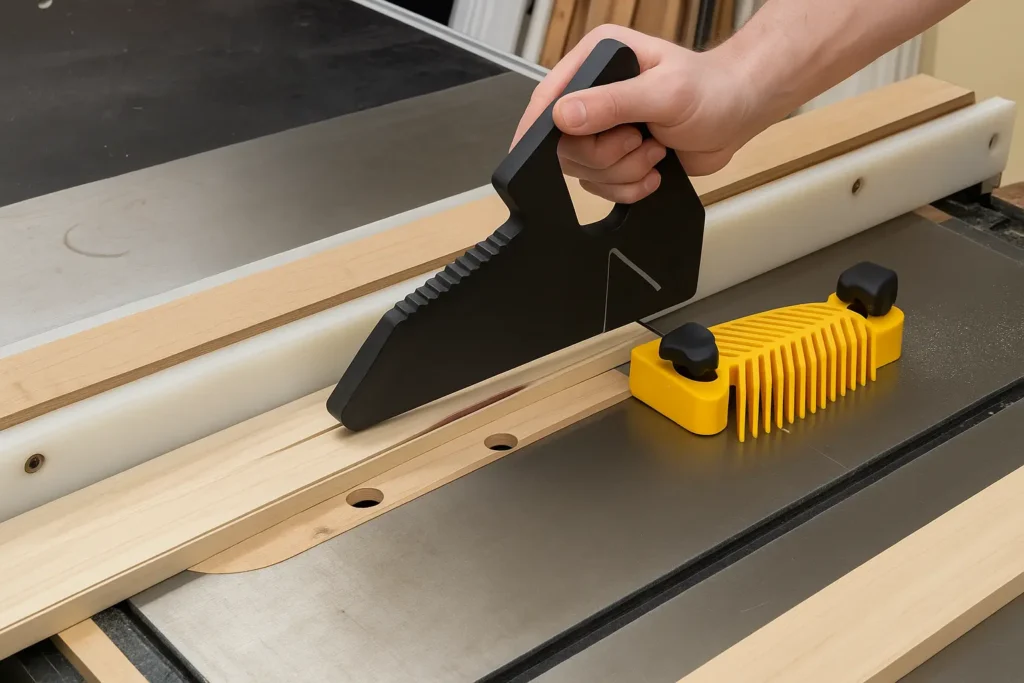
Pro Tip
When installing T-Nuts, take your time to ensure they go in straight. It’s relatively easy to hammer them in slightly crooked which will make it hard to use from the other side.

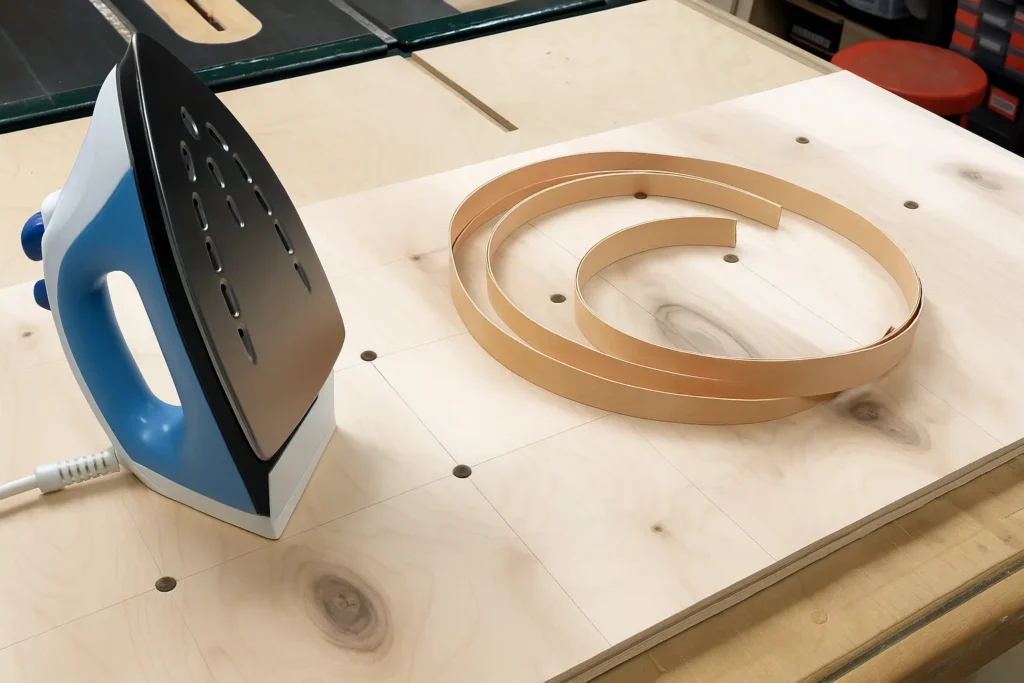
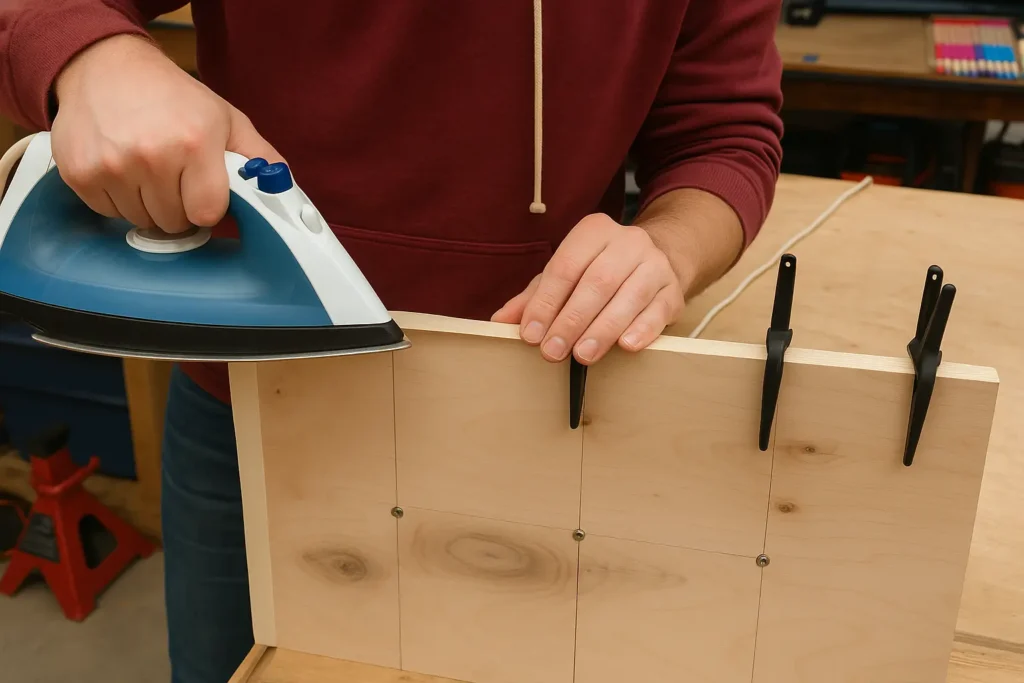

Since the edges of plywood are a bit too rough for our liking, we’re using some edge-banding to pretty it up. This 3/4″ birch edge-banding has glue on the bottom and once it’s cut to size, you can hold it in place with some clamps and then use a regular household iron to heat it up and stick it down.
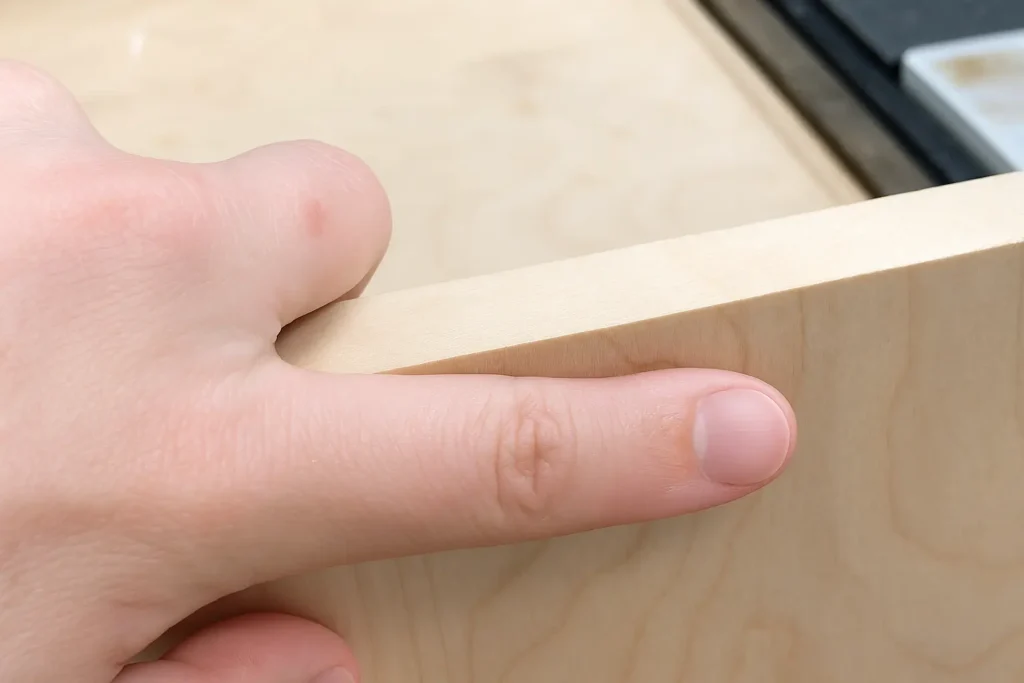
The edges stick out a bit, so we used a block plane to trim off the excess. You could also use some sandpaper to do this.
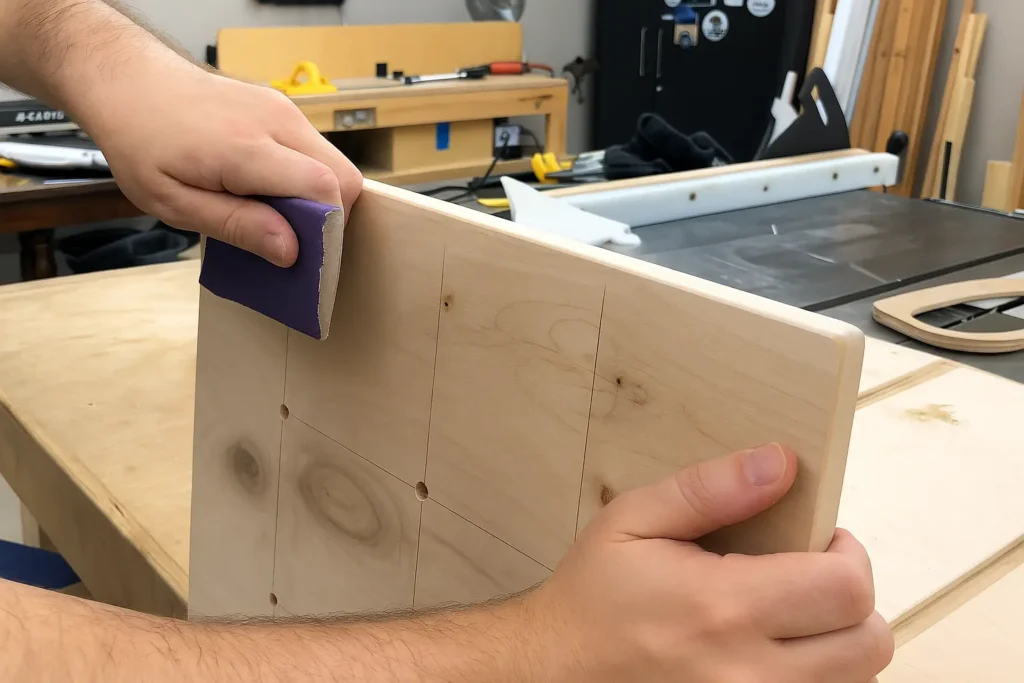
Once the edge-banding was installed all the way around, we used some 220 sandpaper to smooth out the edges and the corners of the ramp, which worked really well.
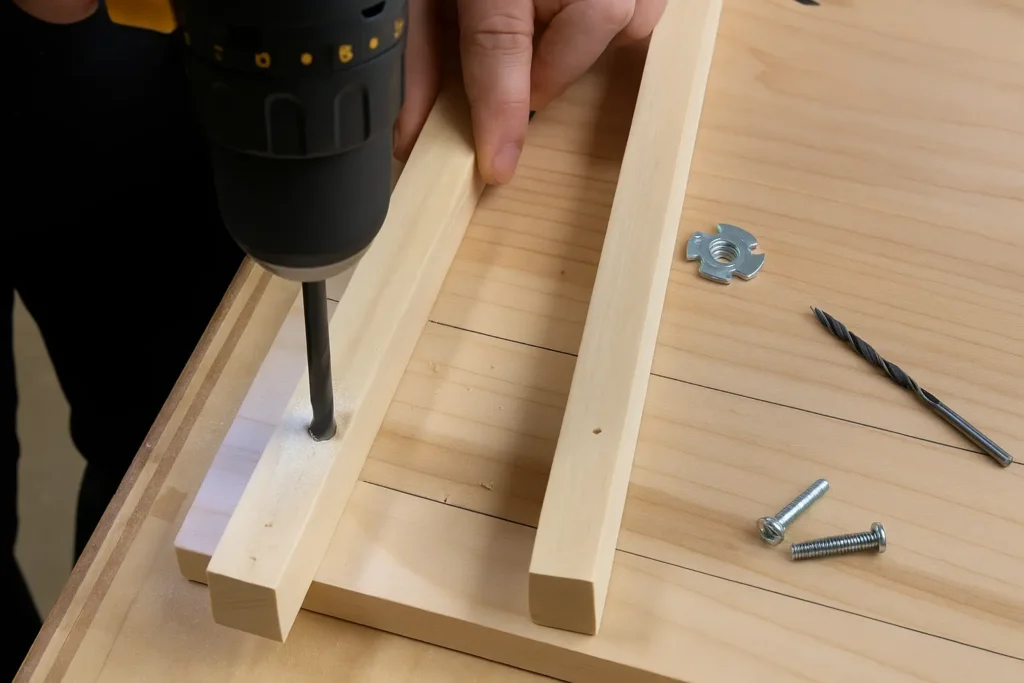
The climbing ramp is meant to rest on the rungs of the ladder, but we also wanted it to be adjustable, so we used some left-over pieces of Poplar and attached them to the bottom of the ramp. The space in between the two pieces is perfectly fit for the 1″ Poplar dowels, so it fits snugly but can still be moved around.
To do this, we cut two pieces of Poplar to the same width as the ramp, and then used a square to position them where we wanted with a scrap piece of 1″ dowel in between. We then drew a line with a pencil to mark the positions.
Next, we drilled some pilot holes and then glued and screwed them into place.
Pro Tip
When we attached them, we moved them to the outside of the pencil line, which created the smallest little extra space to account for the diagonal placement of the ramp. This makes it nice and snug when in place but still easy to move around.
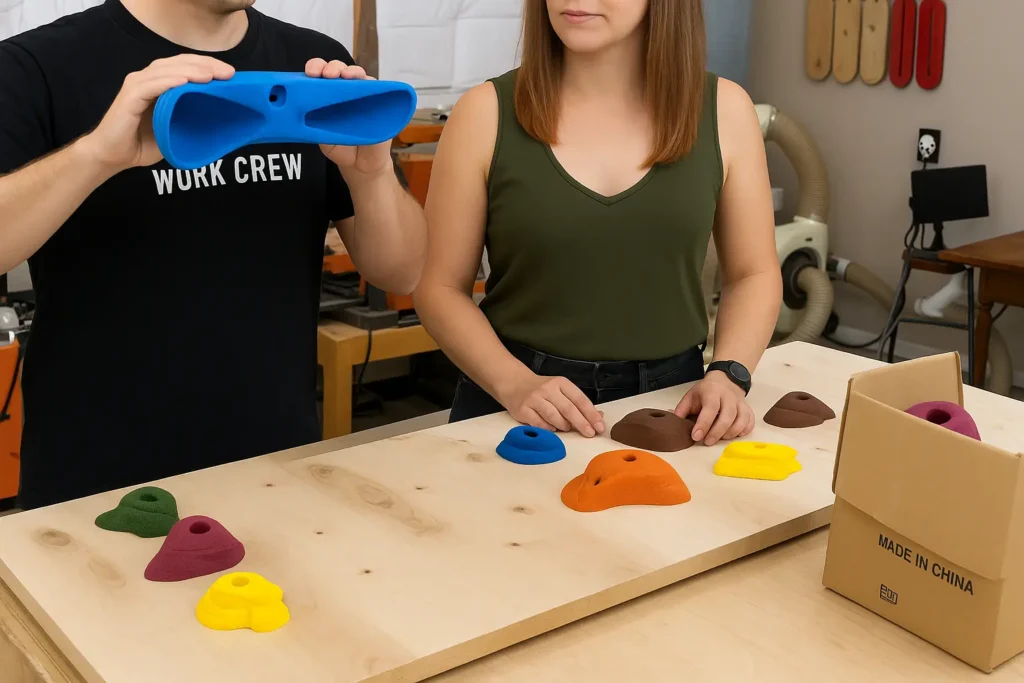
We used to have a rock climbing wall at our house (that we also built together!) so we had a box of climbing holds we weren’t using. (Obviously, not everyone will have these so we show you how you can make your own!)
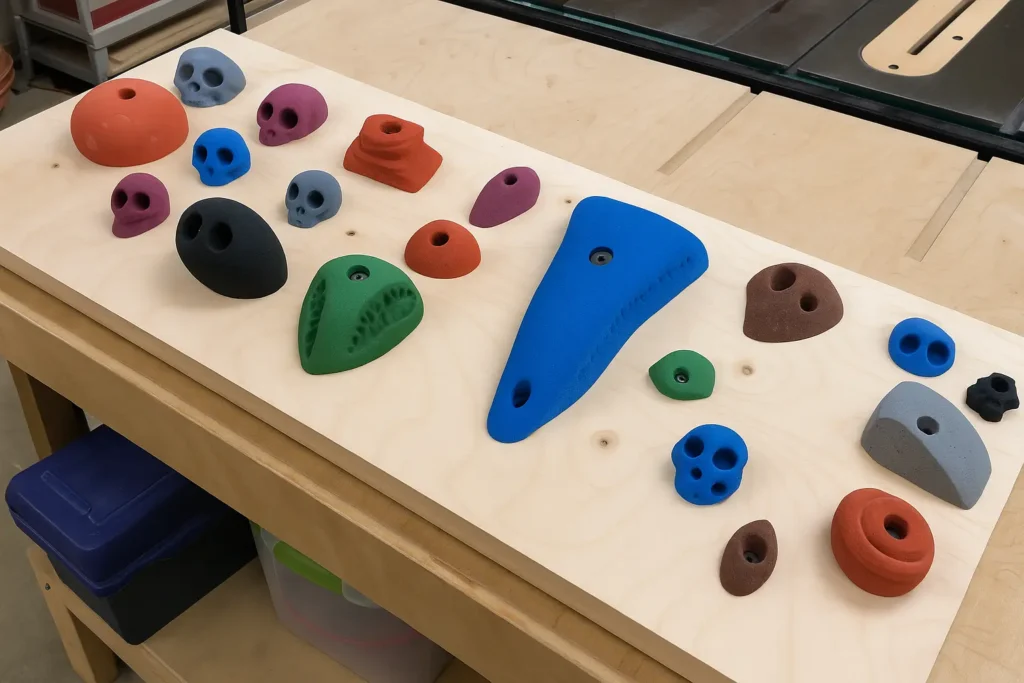
Climbing holds come in a TON of different shapes and sizes and have a lot of different types. Slopers, jugs, crimps, ledges, pinches, etc. Each challenges the climber in a different way. Variety is key!
We spent some time having fun coming up with different arrangements for the holds. We can experiment with different styles and challenge our son more and more as he grows up and gets more comfortable on the ramp.
The climbing holds attach with a 3/8″ hex bolt so they’re easy to take on and off.
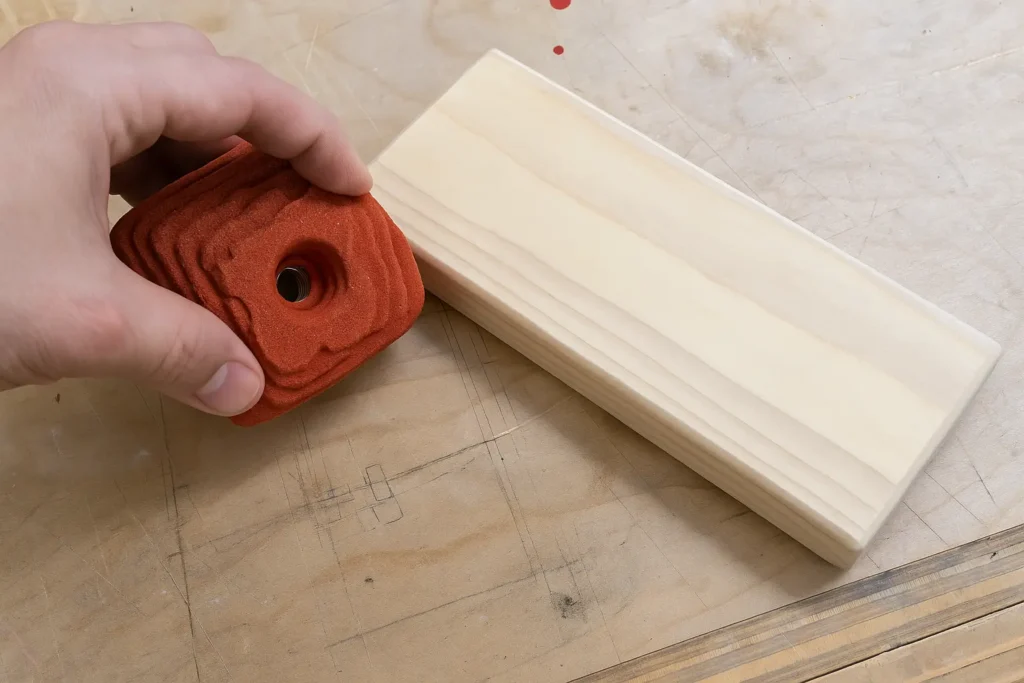
Making Your Own Climbing Holds
To start, find a scrap of wood around 3-8″ in length. Sand it really, really well so the edges aren’t sharp and so there’s no chance for splinters.
The holds we’re using have a hole in the middle with a washer, so find the center of your piece of wood, drill a wider hole for the washer that’s deep enough for the head of your screw, and then drill your second smaller hole.
You can then use some super glue to hold the washer in place. It’s that easy! Instant home-made climbing hold.
A fun way to add some variety is to cut the wood into different shapes and sizes. This challenges the climber by needing to grip the holds in a lot of different ways.
Final Result
We couldn’t be happier with the end result of our DIY Pikler Triangle project! Our son absolutely loves his new climbing equipment and it’s clear we’re going to get years of use out of this beautifully crafted piece. The combination of the main triangle structure, adjustable climbing ramp, and custom climbing holds creates a comprehensive gross motor development setup that grows with your child. Best part? He’s always ready for a serious nap after an active climbing session! 🙂

This homemade Pikler Triangle not only provides endless hours of active play but also supports your child’s physical development, coordination, and confidence. The quality materials and thoughtful design ensure it’s both safe and durable, making it a worthwhile investment in your child’s development and play space.

You May Also Like
Tiny Land Pikler Triangle Set Review: 7-in-1 Worth It?

Montessori Cultural Curriculum: Complete Guide to Cosmic Education